

Qualtrics is the University’s recommended tool to create, manage and report on online surveys.
Qualtrics is designed to be easy-to-use, with dozens of templates and sample surveys to customise for your own use. You can collaborate with others while producing the survey and also download the results of your surveys into a variety of formats.
There’s a wealth of information on how to make the most out of Qualtrics’ tools and customisation options which can be found here. There is also information on the University’s IT Services page. Expand the sections below for short guides to help you get started with Qualtrics.
Create a Survey
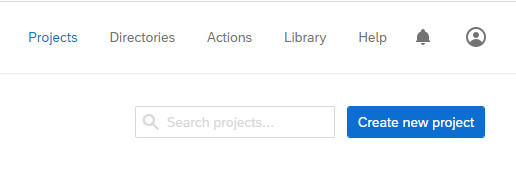
On the right-hand side of Qualtrics homepage, you should see a blue button which says Create new project.
Click on this to begin creating your survey. This will bring up a couple of options. You can create a survey from scratch by clicking Survey or the dropdown menu on the right which says Create your own to choose from a list of templates.
Each area listed on the dropdown menu will include a variety of templates, so choose the one that matches your project most closely. For example, Events provides you with specific templates such as Event Feedback and RSVP/Signup Form. The templates can be edited as much as you like once you click Get Started.
The only difference between creating a survey from scratch and choosing from a template is that a template will automatically generate a list of blocks (containing the name, content and responses for each question) that are relevant to the area in question. Again, these questions are fully customisable and can be amended, deleted or added to at your whim.
If you chose Survey and then Get Started to create your survey from scratch, Qualtrics will generate a project with a single, multiple choice question block to start with. You can edit or delete this as you see fit. The default project name will be Untitled Project and you can edit this by double-clicking the text field.
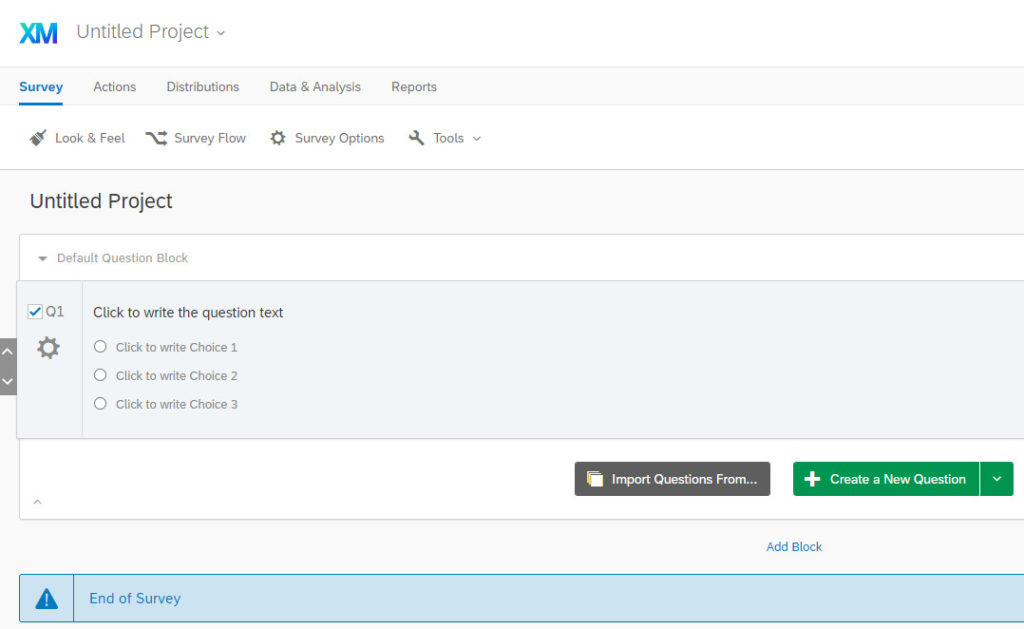
To add more questions, click the green button saying + Create a New Question or v to see a list of options. + Create a New Question will generate another multiple choice question block which can also be editable. The dropdown menu brought up by clicking v gives you a variety of options to choose from such as Matrix Table, Slider or Heat Map. It’s worth looking through these if you have specific needs for your project, as there are a wide range of question types available.
Once you’re happy with the name of your survey and question blocks, click the green button in the top right-hand corner of the page saying Publish.
Qualtrics is highly customisable and there are a wealth of options available to tailor content according to your need. For more information on how to customise your survey, click here.
Working Collaboratively on Your Survey
Qualtrics is designed to make working with others easy. In order to manage and amend the people who have access to the project, click the Tools dropdown list in the Survey tab. Then select Collaborate.
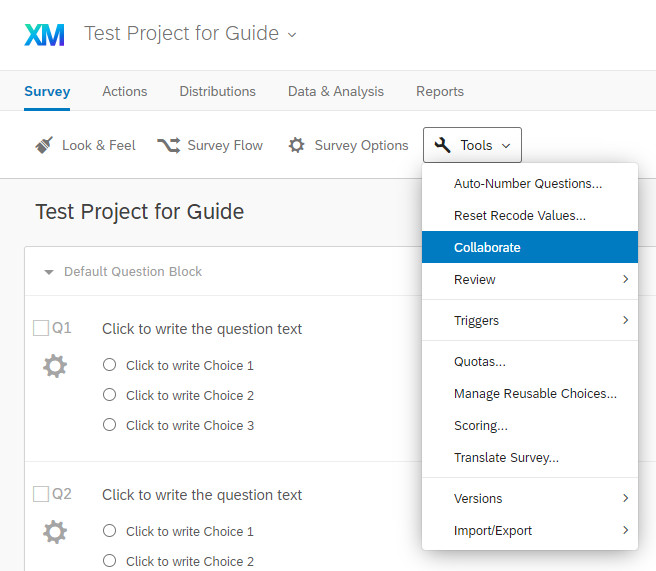
You can use this to add new colleagues to the project. You can also manage the level of access granted to each person. For example, if you don’t want to allow a certain collaborator to access the results of the survey, you can achieve this with the Collaborate tool.
Once you’ve added someone to your project, simply tick or untick their permissions with the Collaborate tool to control what they can see and do.
Distributing Your Survey
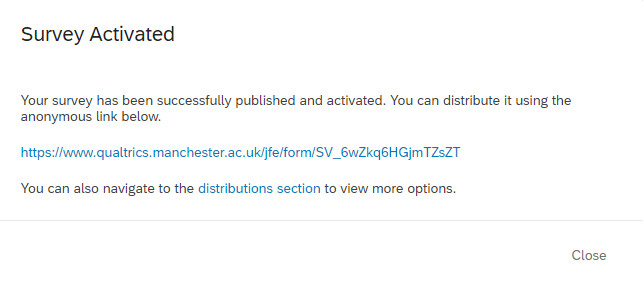
Successfully publishing your survey will bring up a box with a link to the survey. You can distribute this to potential respondents as you see fit. Alternatively, this box also gives you a link to the distributions section for more advanced options.
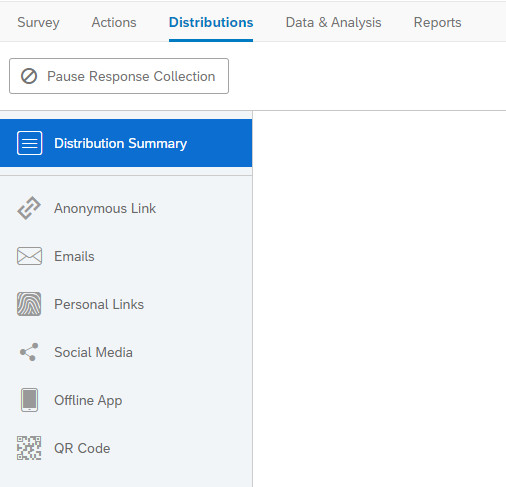
The Distributions Summary can also be accessed from your project by clicking Distributions on the list in the top left. This space gives you a number of methods to distribute your survey, including through social media, QR code and email. You can choose multiple methods of distribution if you wish.
Accessing Results
After you’ve built and distributed the survey, you’ll probably want to access the results. There are two ways of doing this within the Projects area.
Data & Analysis allows you to filter, classify, merge, clean and statistically analyse the results to your survey. You can also import/export data easily through the Data & Analysis tab by clicking the Import/Export Data dropdown menu and selecting from the options.
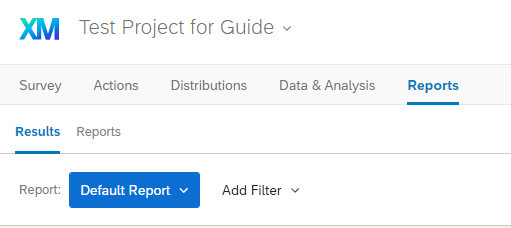
Reports allows you to run reports where you can customise how the data is displayed and share these results with others. There are two tools you can use in this area to build these reports: Results and Reports. Results produces a Default Report consisting of question-based Pages and customizable Visualizations. Reports gives options for customisation, allowing you to build your report from the ground up and giving you greater control over how the data is displayed.
Qualtrics allows for a wide range of customisation and data analysis. An overview of the Data & Analysis tab is available here and an overview for the Reports tab is available here.
Exporting Survey Data and Questions
You might want to use the date you’ve gathered from your survey elsewhere. Qualtrics has several methods of exporting your data.
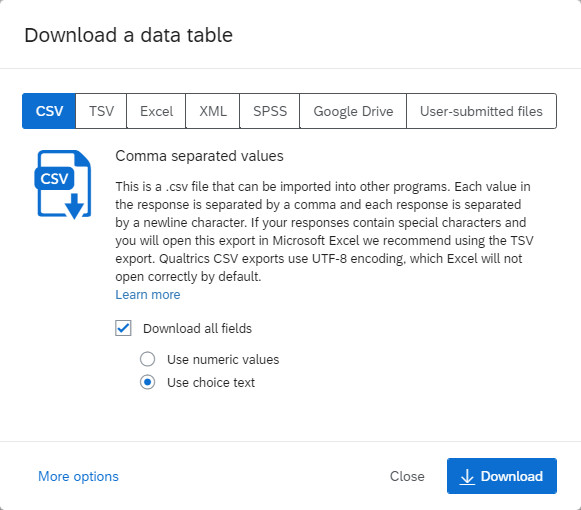
As mentioned above, you can export the raw data with the Data & Analysis tab by clicking the Import/Export Data dropdown menu and selecting from the options. Selecting Export Data from the menu will bring up a series of file types and export methods to choose from for your table of data. You can also click More options to customise the data further.
If you want to export a report that you’ve designed within Qualtrics, head to the Reports tab. Click Share Report on the top right-hand of this tab to open a dropdown menu. This gives the option of downloading reports as CSV, PDF, Word or PowerPoint files.
Finally, if you want to export the survey itself, you need to go to the Survey tab. Click Tools and then select Import/Export from the dropdown menu. This allows you to export the survey and its content to QSV (Qualtrics’ own survey filetype), PDF or Word. You can also import questions from a different quiz using this method.
Further information
Further information on the features of Qualtrics is available at: