
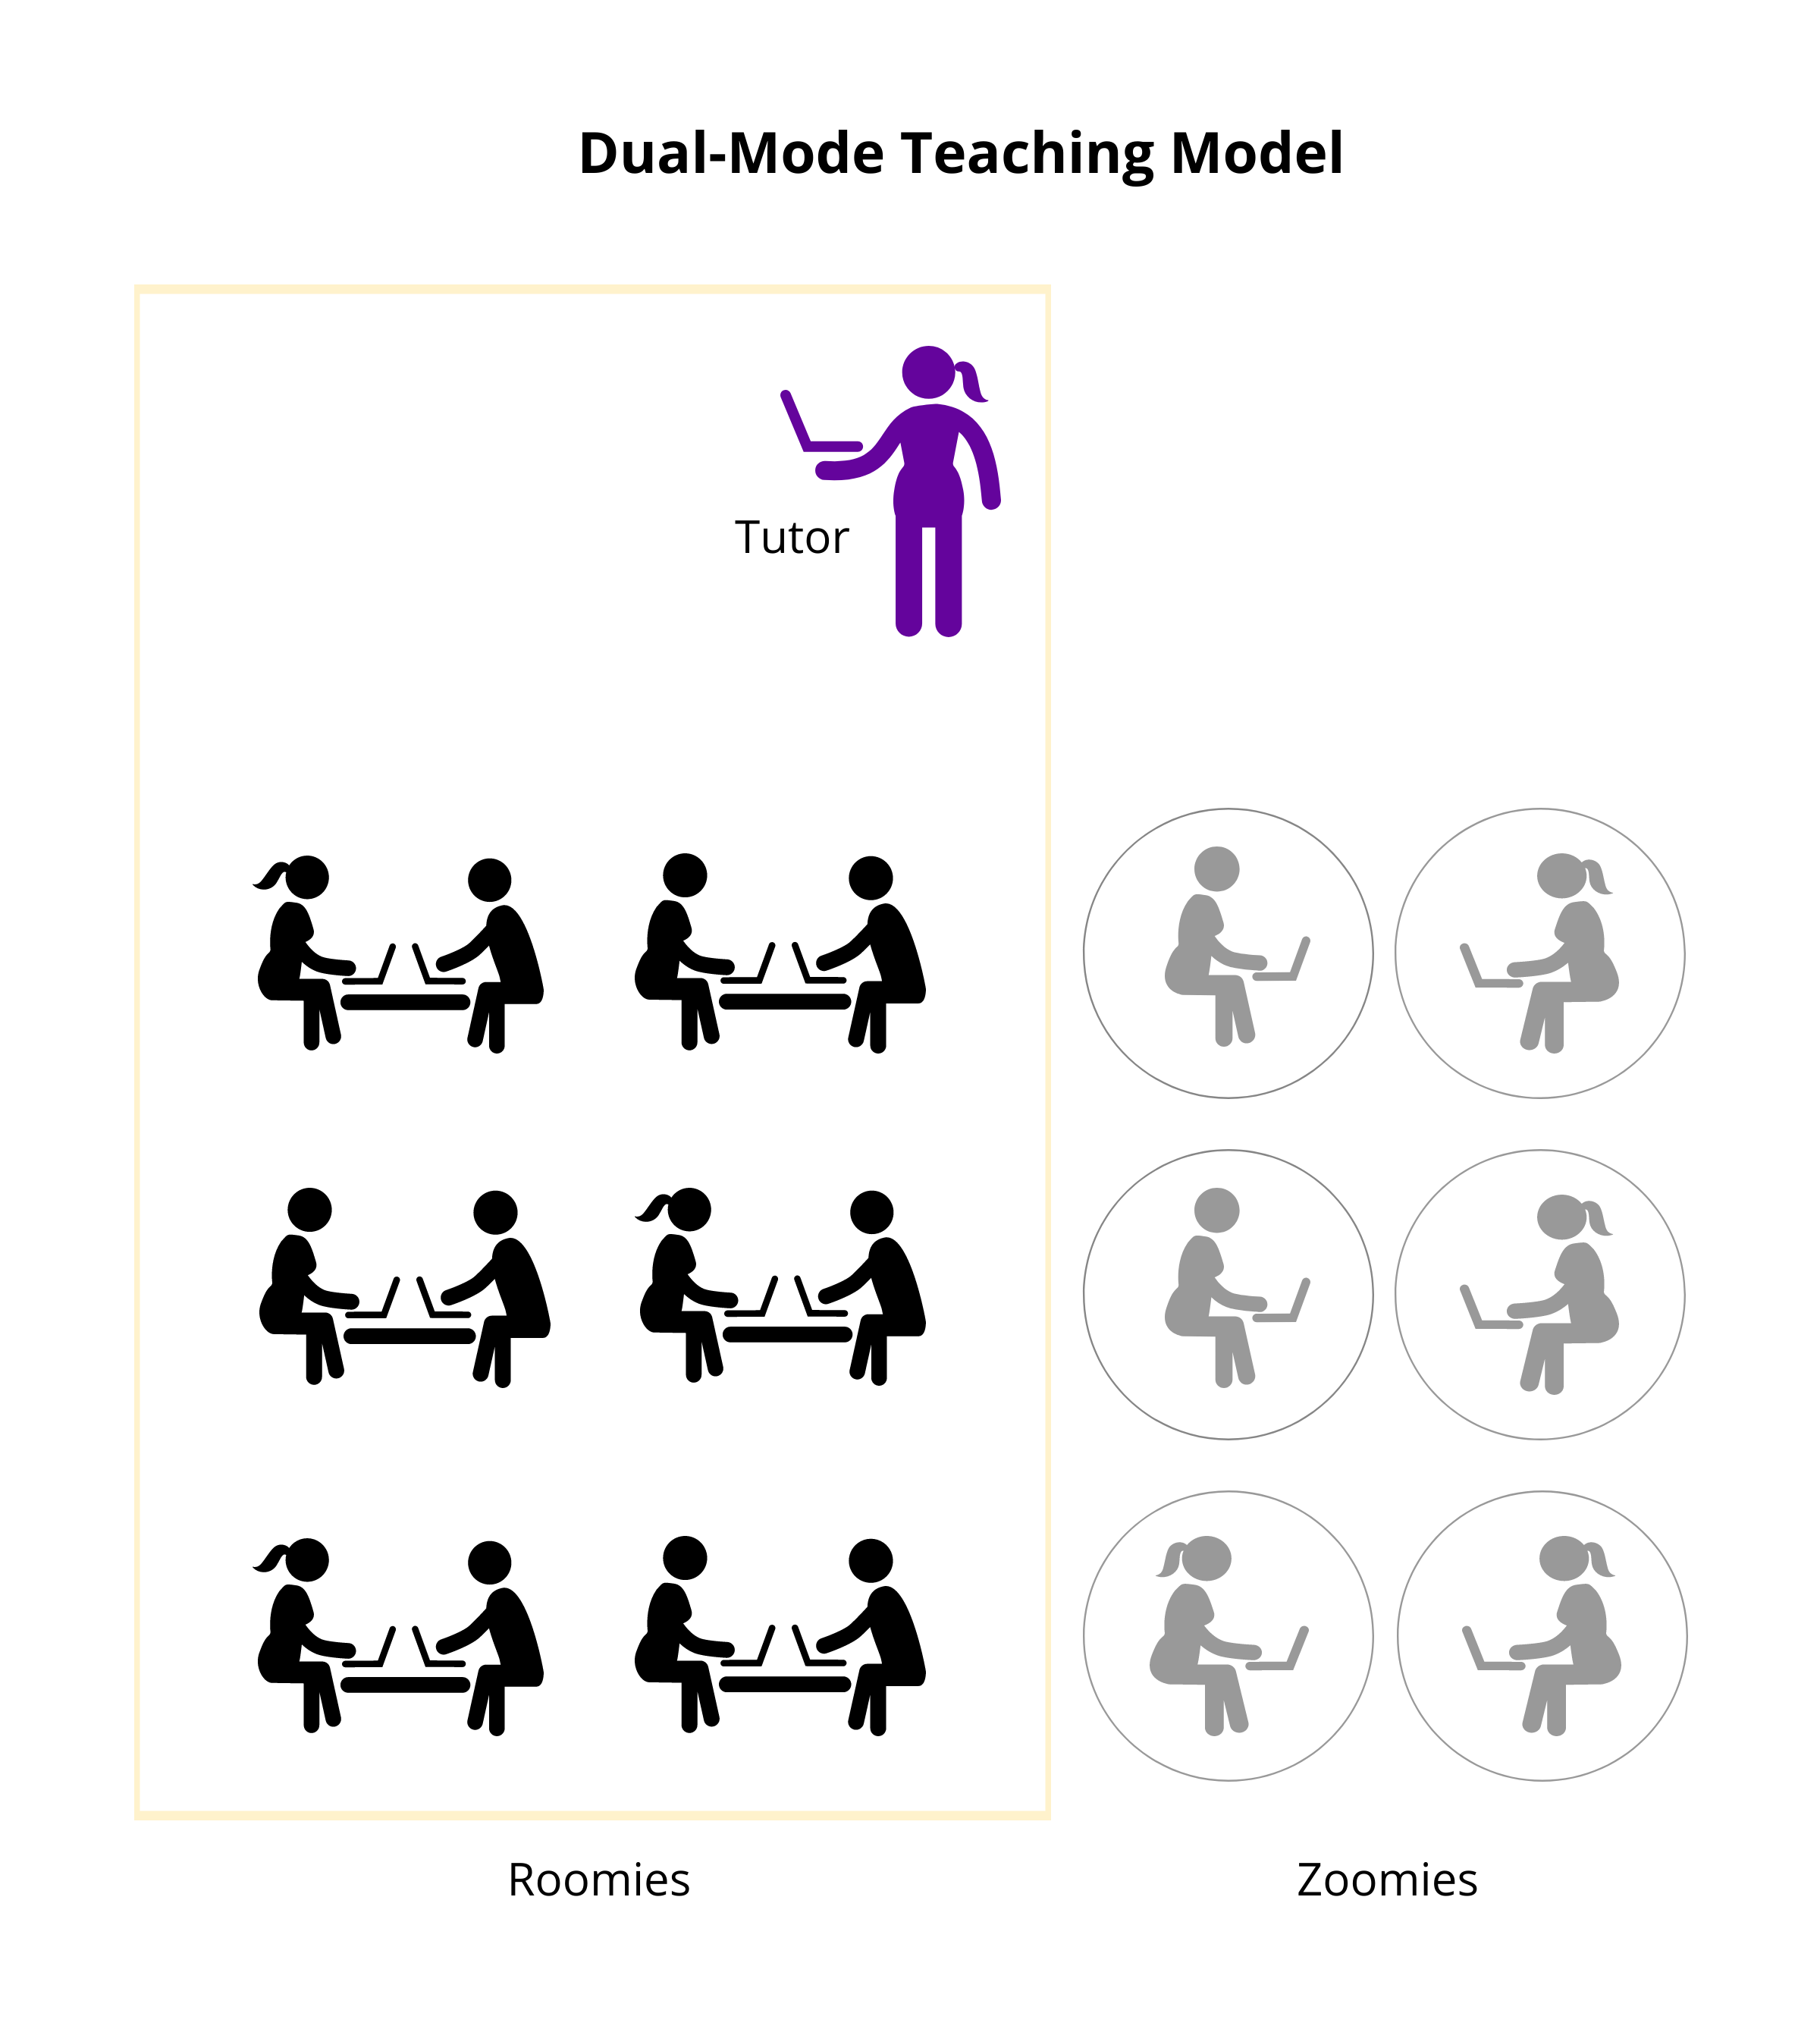
Dual-mode teaching (also referred to as dual delivery, blended synchronous learning or hybrid flexible teaching) refers to a teaching method where the same learning activities are experienced by students on-campus (in-person) and remote (e.g. at home) within a single group session and at the same time (synchronous). For example, a session where some students are present in a physical teaching space on-campus, while others join in remotely via Zoom.
Students are expected to attend the session, but have the option of attending the face-to-face class or participating remotely. Both groups are online. Remote students may be referred to as ‘Zoomies’, and in-class students are ‘Roomies’.
Benefits
- There is human contact with and between students at regular intervals, either face-to-face or online.
- If students can choose their mode of participation, they will greatly appreciate the flexibility and personal choice.
- Useful during pandemics to adhere to public health guidance, such as social distancing and isolation.
Challenges
- It takes a great deal of concentration on the part of the teachers to be attentive to both what is happening in front of them and at a distance. Co-teaching could be a solution.
- Connectivity issues (slow or interrupted connection) may occur. It is worth acknowledging that not all students will have equity with technology and digital competency.
References and further reading
- Bradley University (2021). The Hyflex Model vs. Dual-Delivery: Learn: Teaching at Bradley University.
- Collett, D. (2021). Dual-Delivery. Learning Environments.
- Franklin, K.B. (2020). Models of Course Delivery. Clemson University.
- Rhéaume, C. (2020). Different teaching models: face-to-face, distance, dual-mode and blended.
Below are some common questions people have asked about dual-mode teaching, with full answers in which we hope that you will be able to find all of the information you might need to enable you to explore this exciting teaching model. Select + to learn more.
Why is dual-mode teaching being introduced at the University of Manchester?
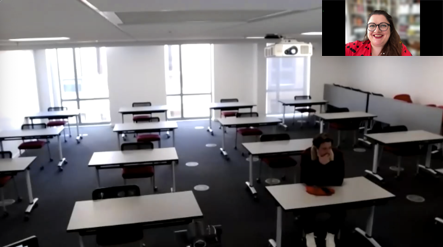
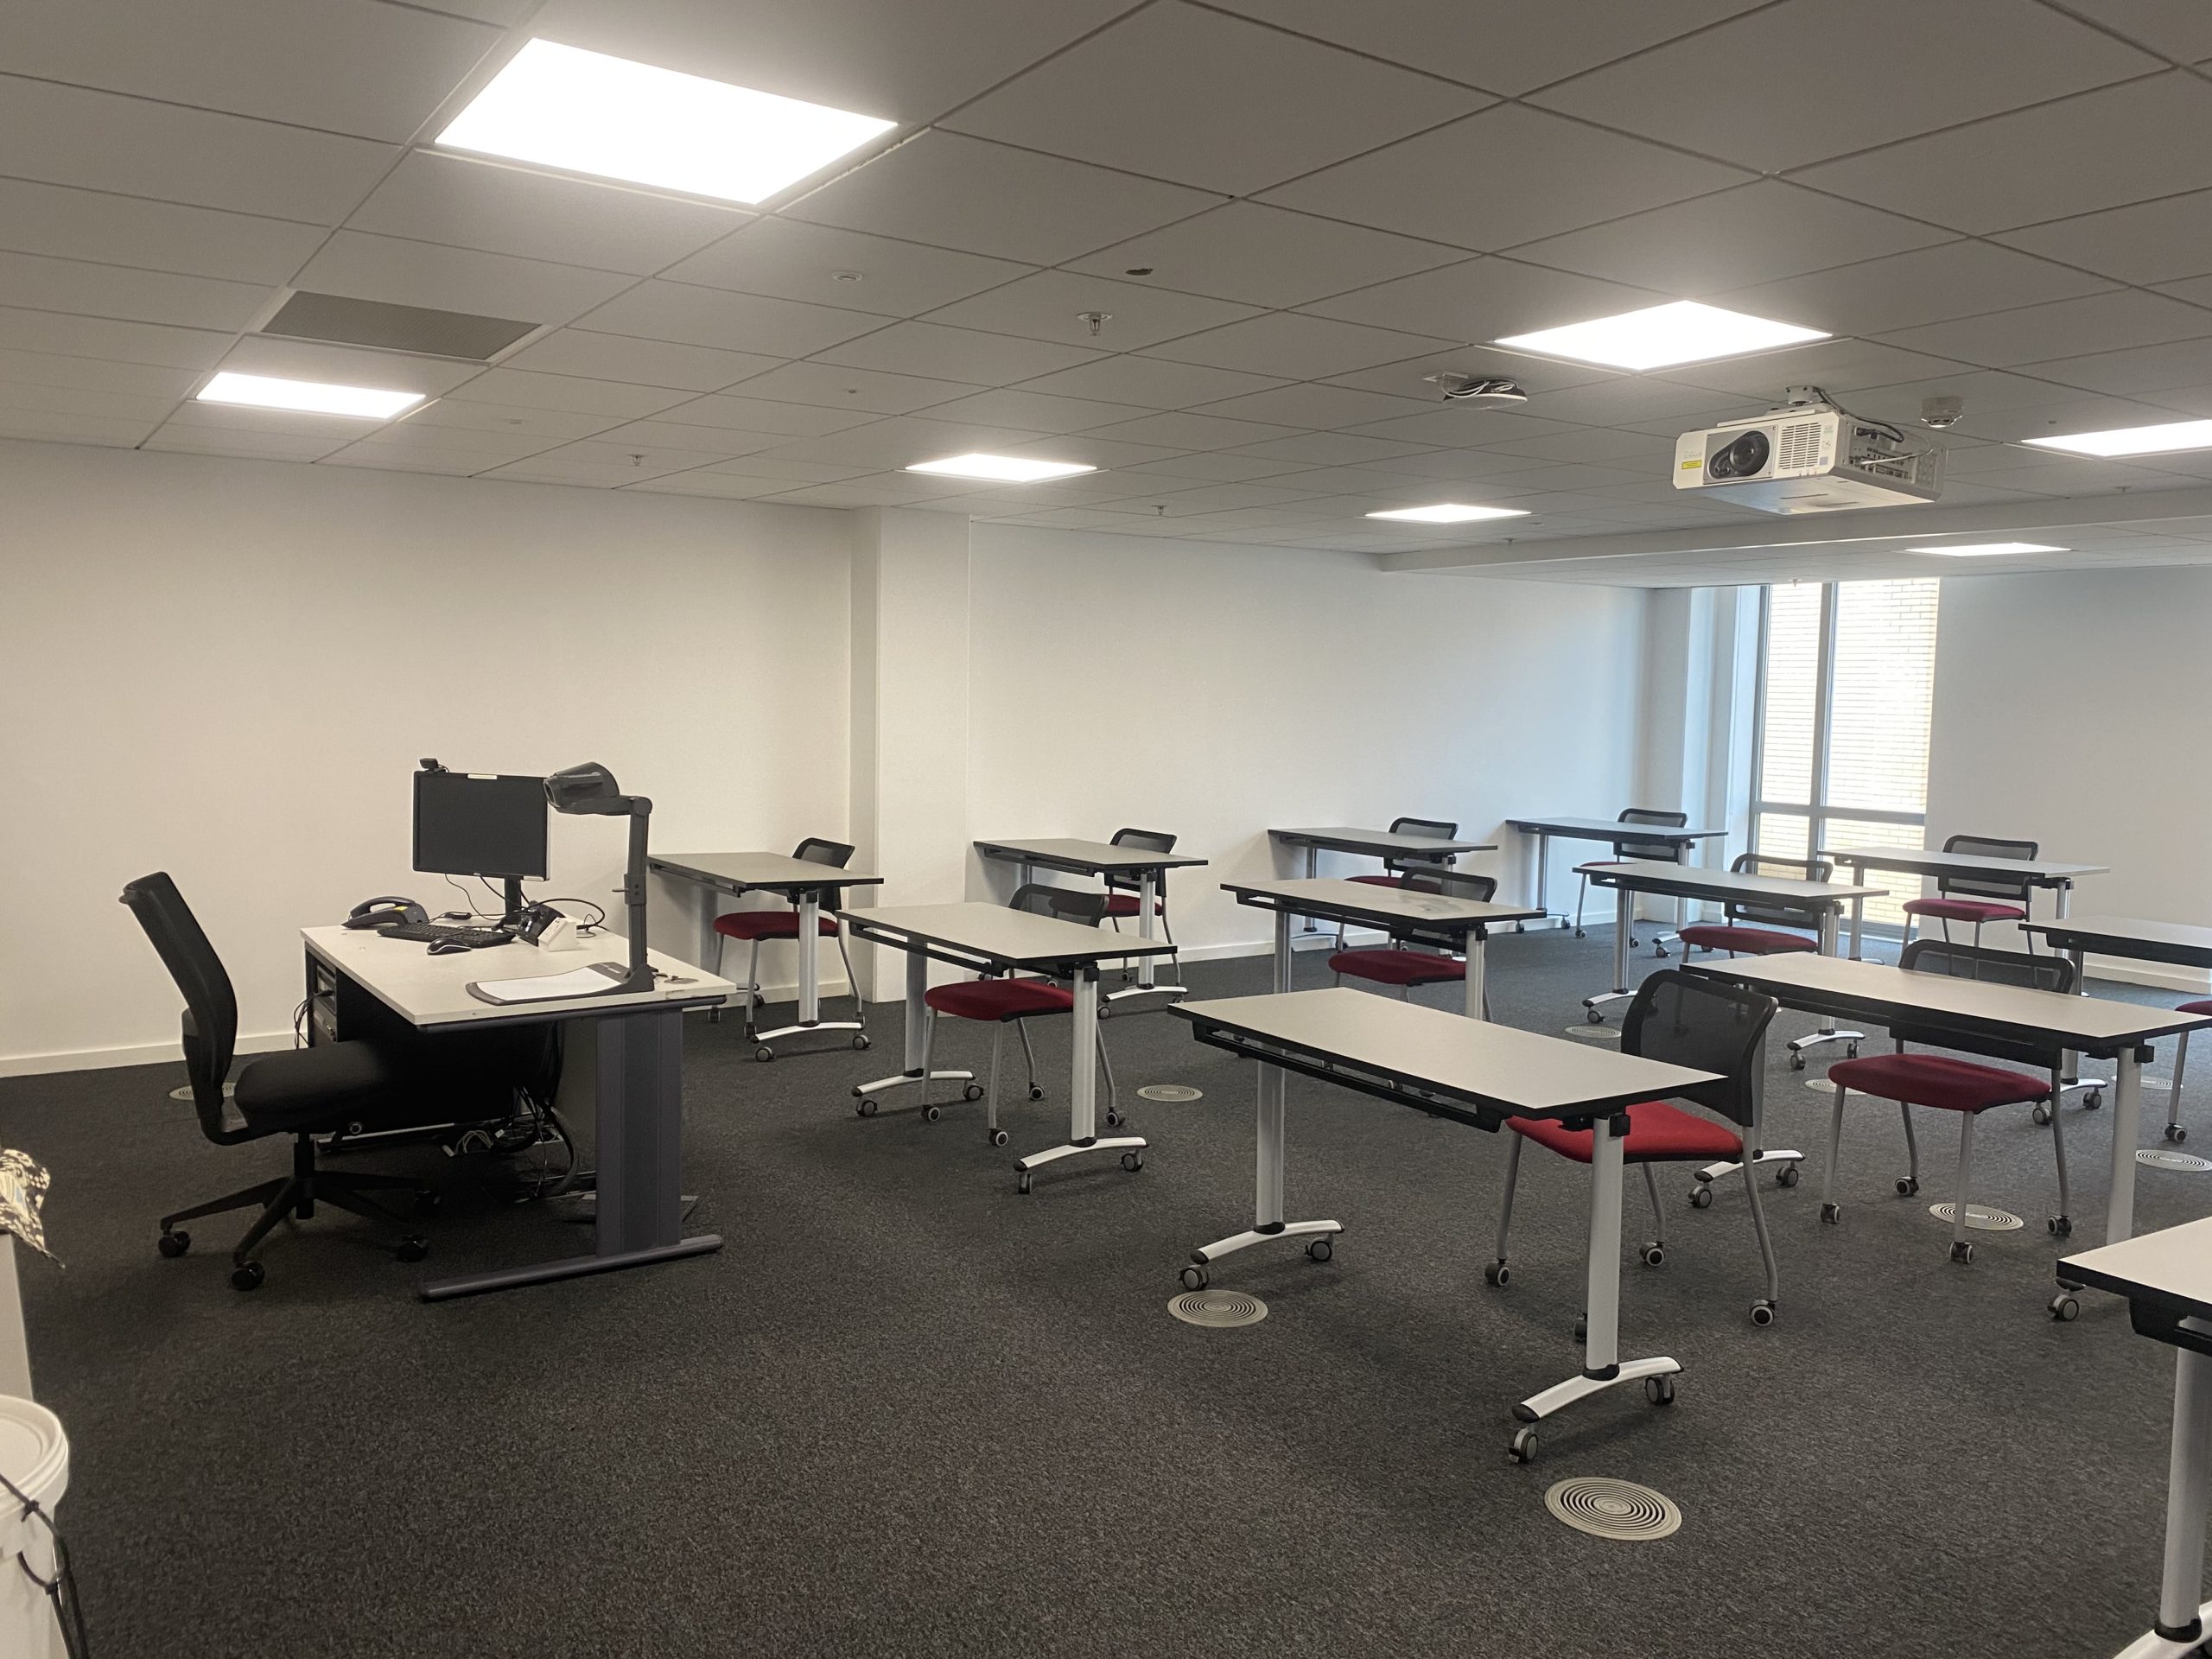
As part of the University’s commitment to ensure that we can offer teaching both in-person and remotely, Media Services has equipped a large number of CTS spaces on campus with high-end webcams and microphone equipment to enable teaching via video conferencing platforms, such as Zoom.
More information:
Dual-mode teaching has already been practised successfully by some academics at the University who have shared their experiences. This demonstrates what is possible with the support of learning technology.
See also: HUMs Teaching Online Workshop (Dual Delivery with Pre-sessional students); Hybrid tutorial equipment test – Richard Prince
Where can I find more advice and support with teaching and learning activities?
Dual-mode technology
What technology is available?
Media Services have installed 2 cameras in each room, a Logitech PTZ (Pan, Tilt and Zoom) camera which is directed towards the occupants of the room and a Papalook webcam mounted on top of the monitor at the teaching desk. This allows those who are teaching to decide what view the remote participants can see. Tutors can then use Zoom on the teaching computer (or their own laptop, connected to the HDMI cable).
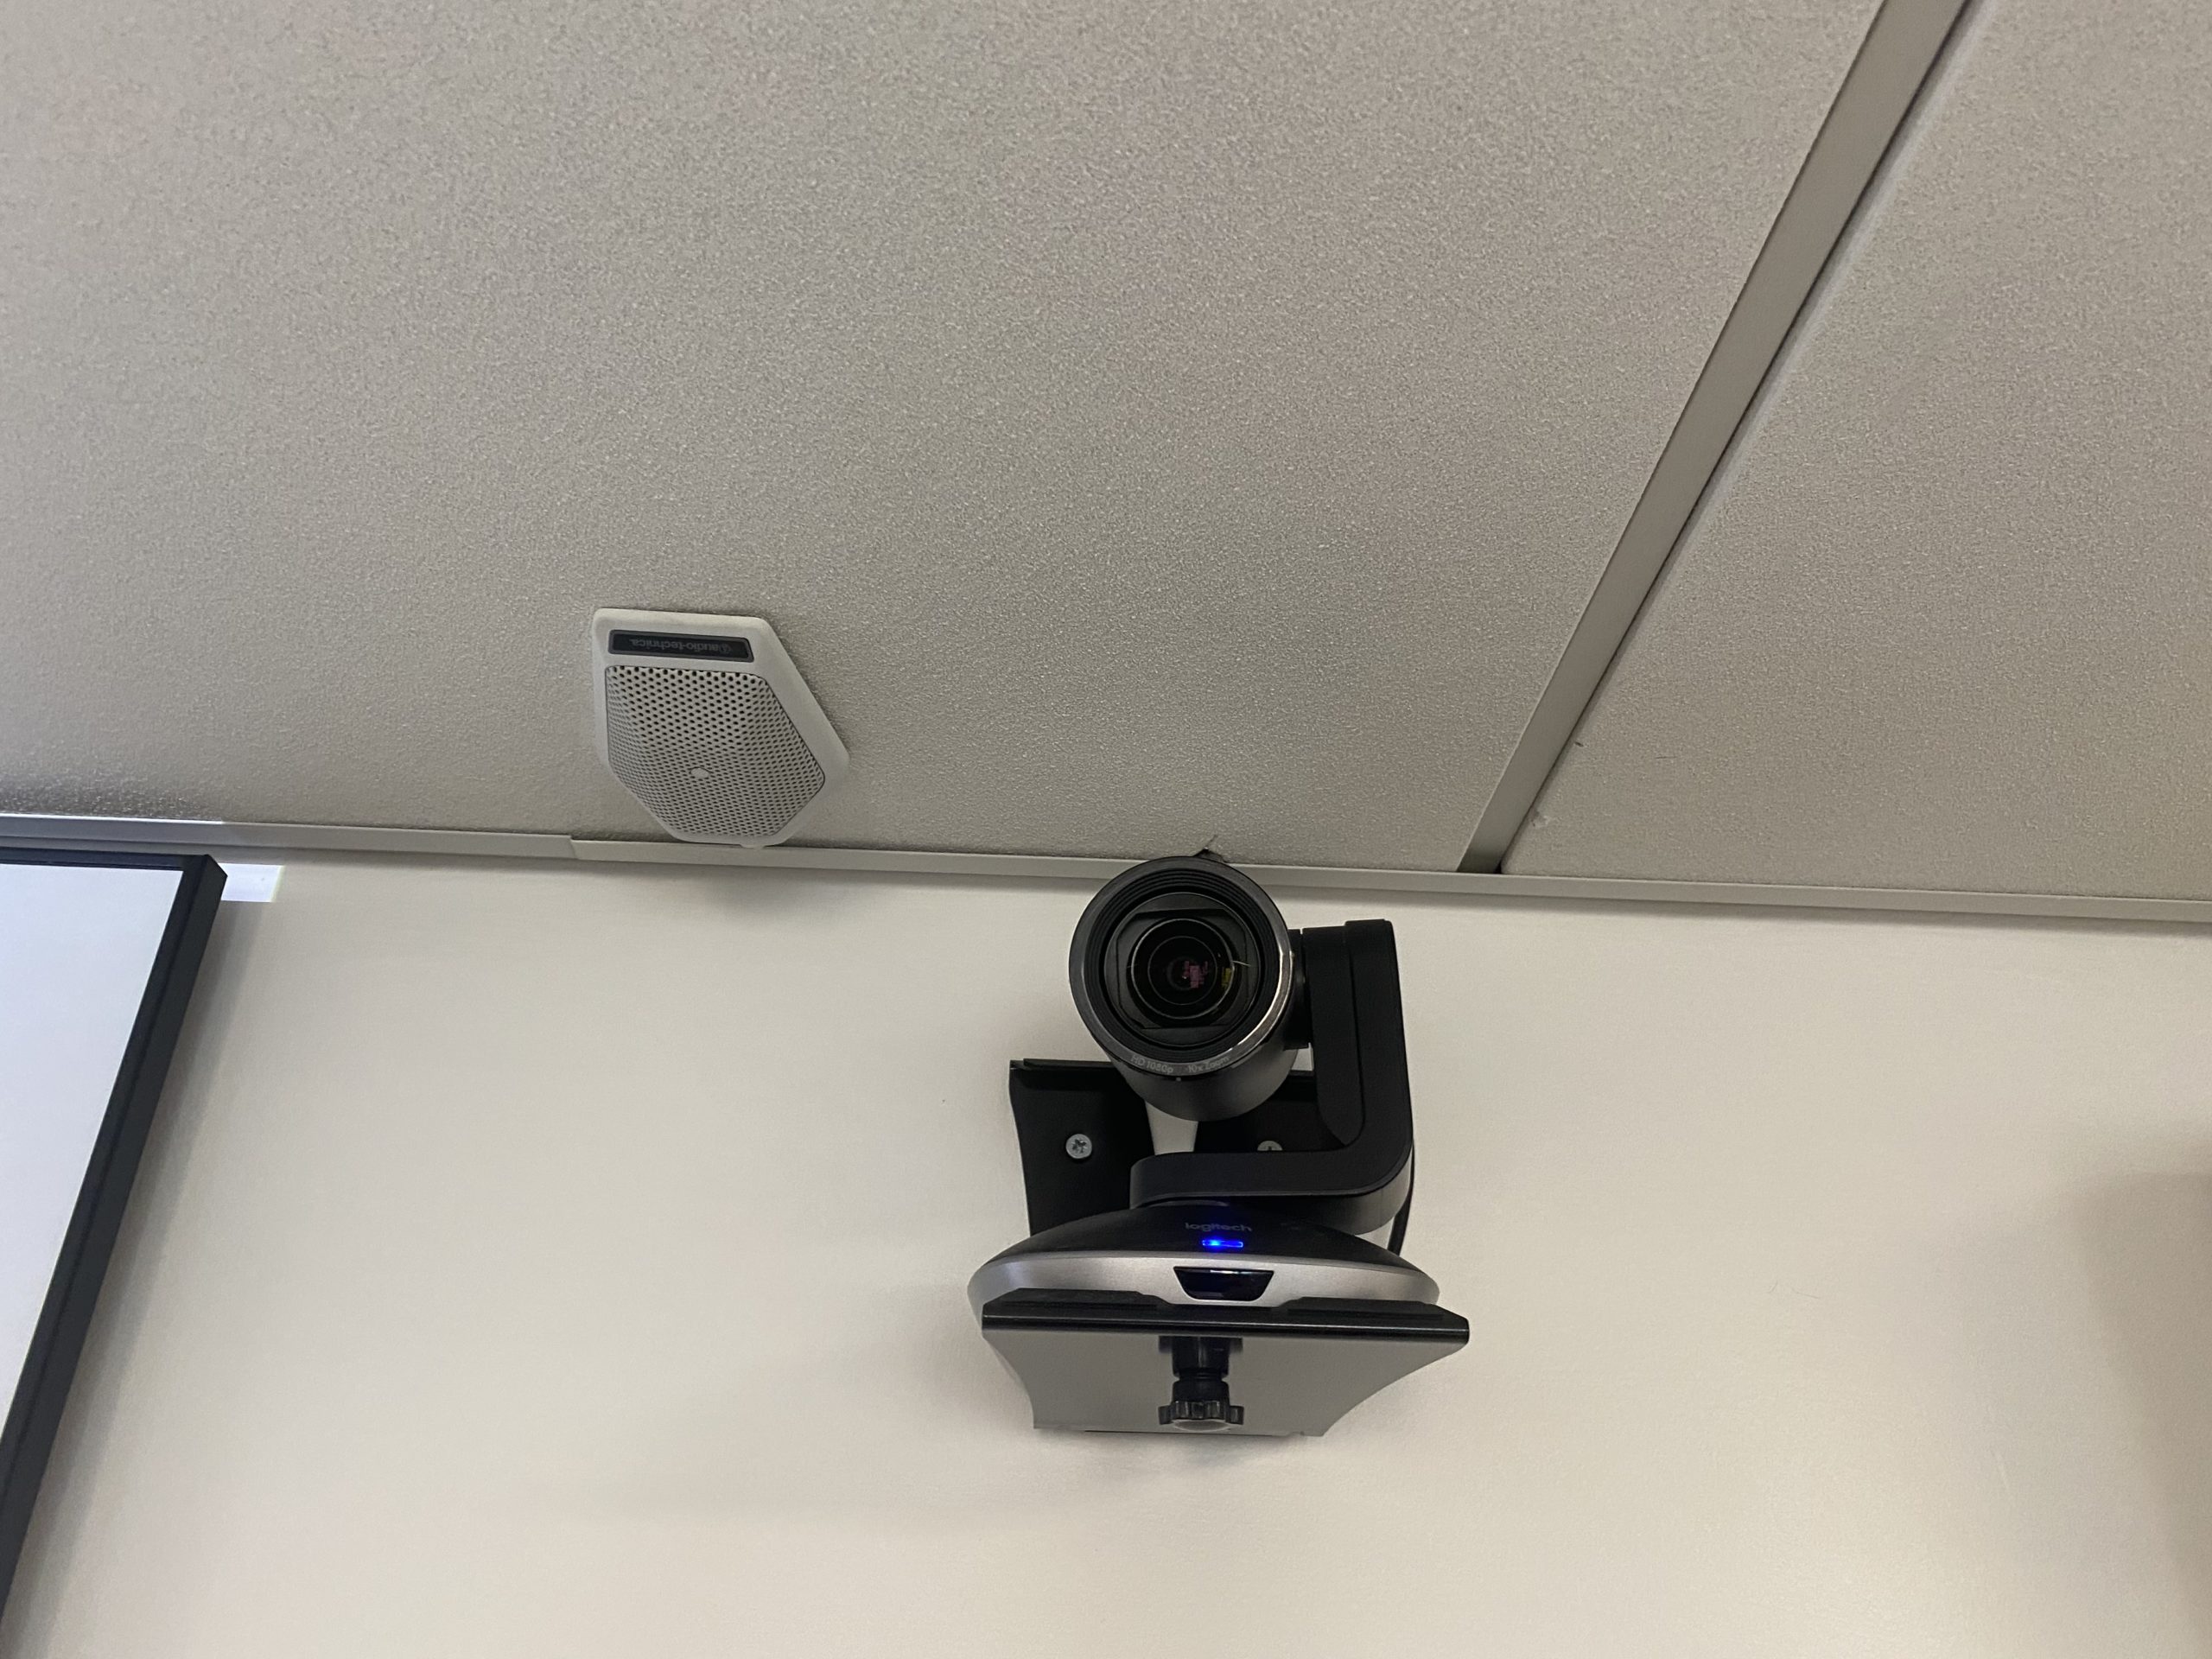
Discrete microphones have also been fitted in teaching spaces and theatres to pick up those who are teaching or running sessions and the students. The microphones have excellent pickup coverage to ensure that remote participants can clearly hear what is happening during the session.
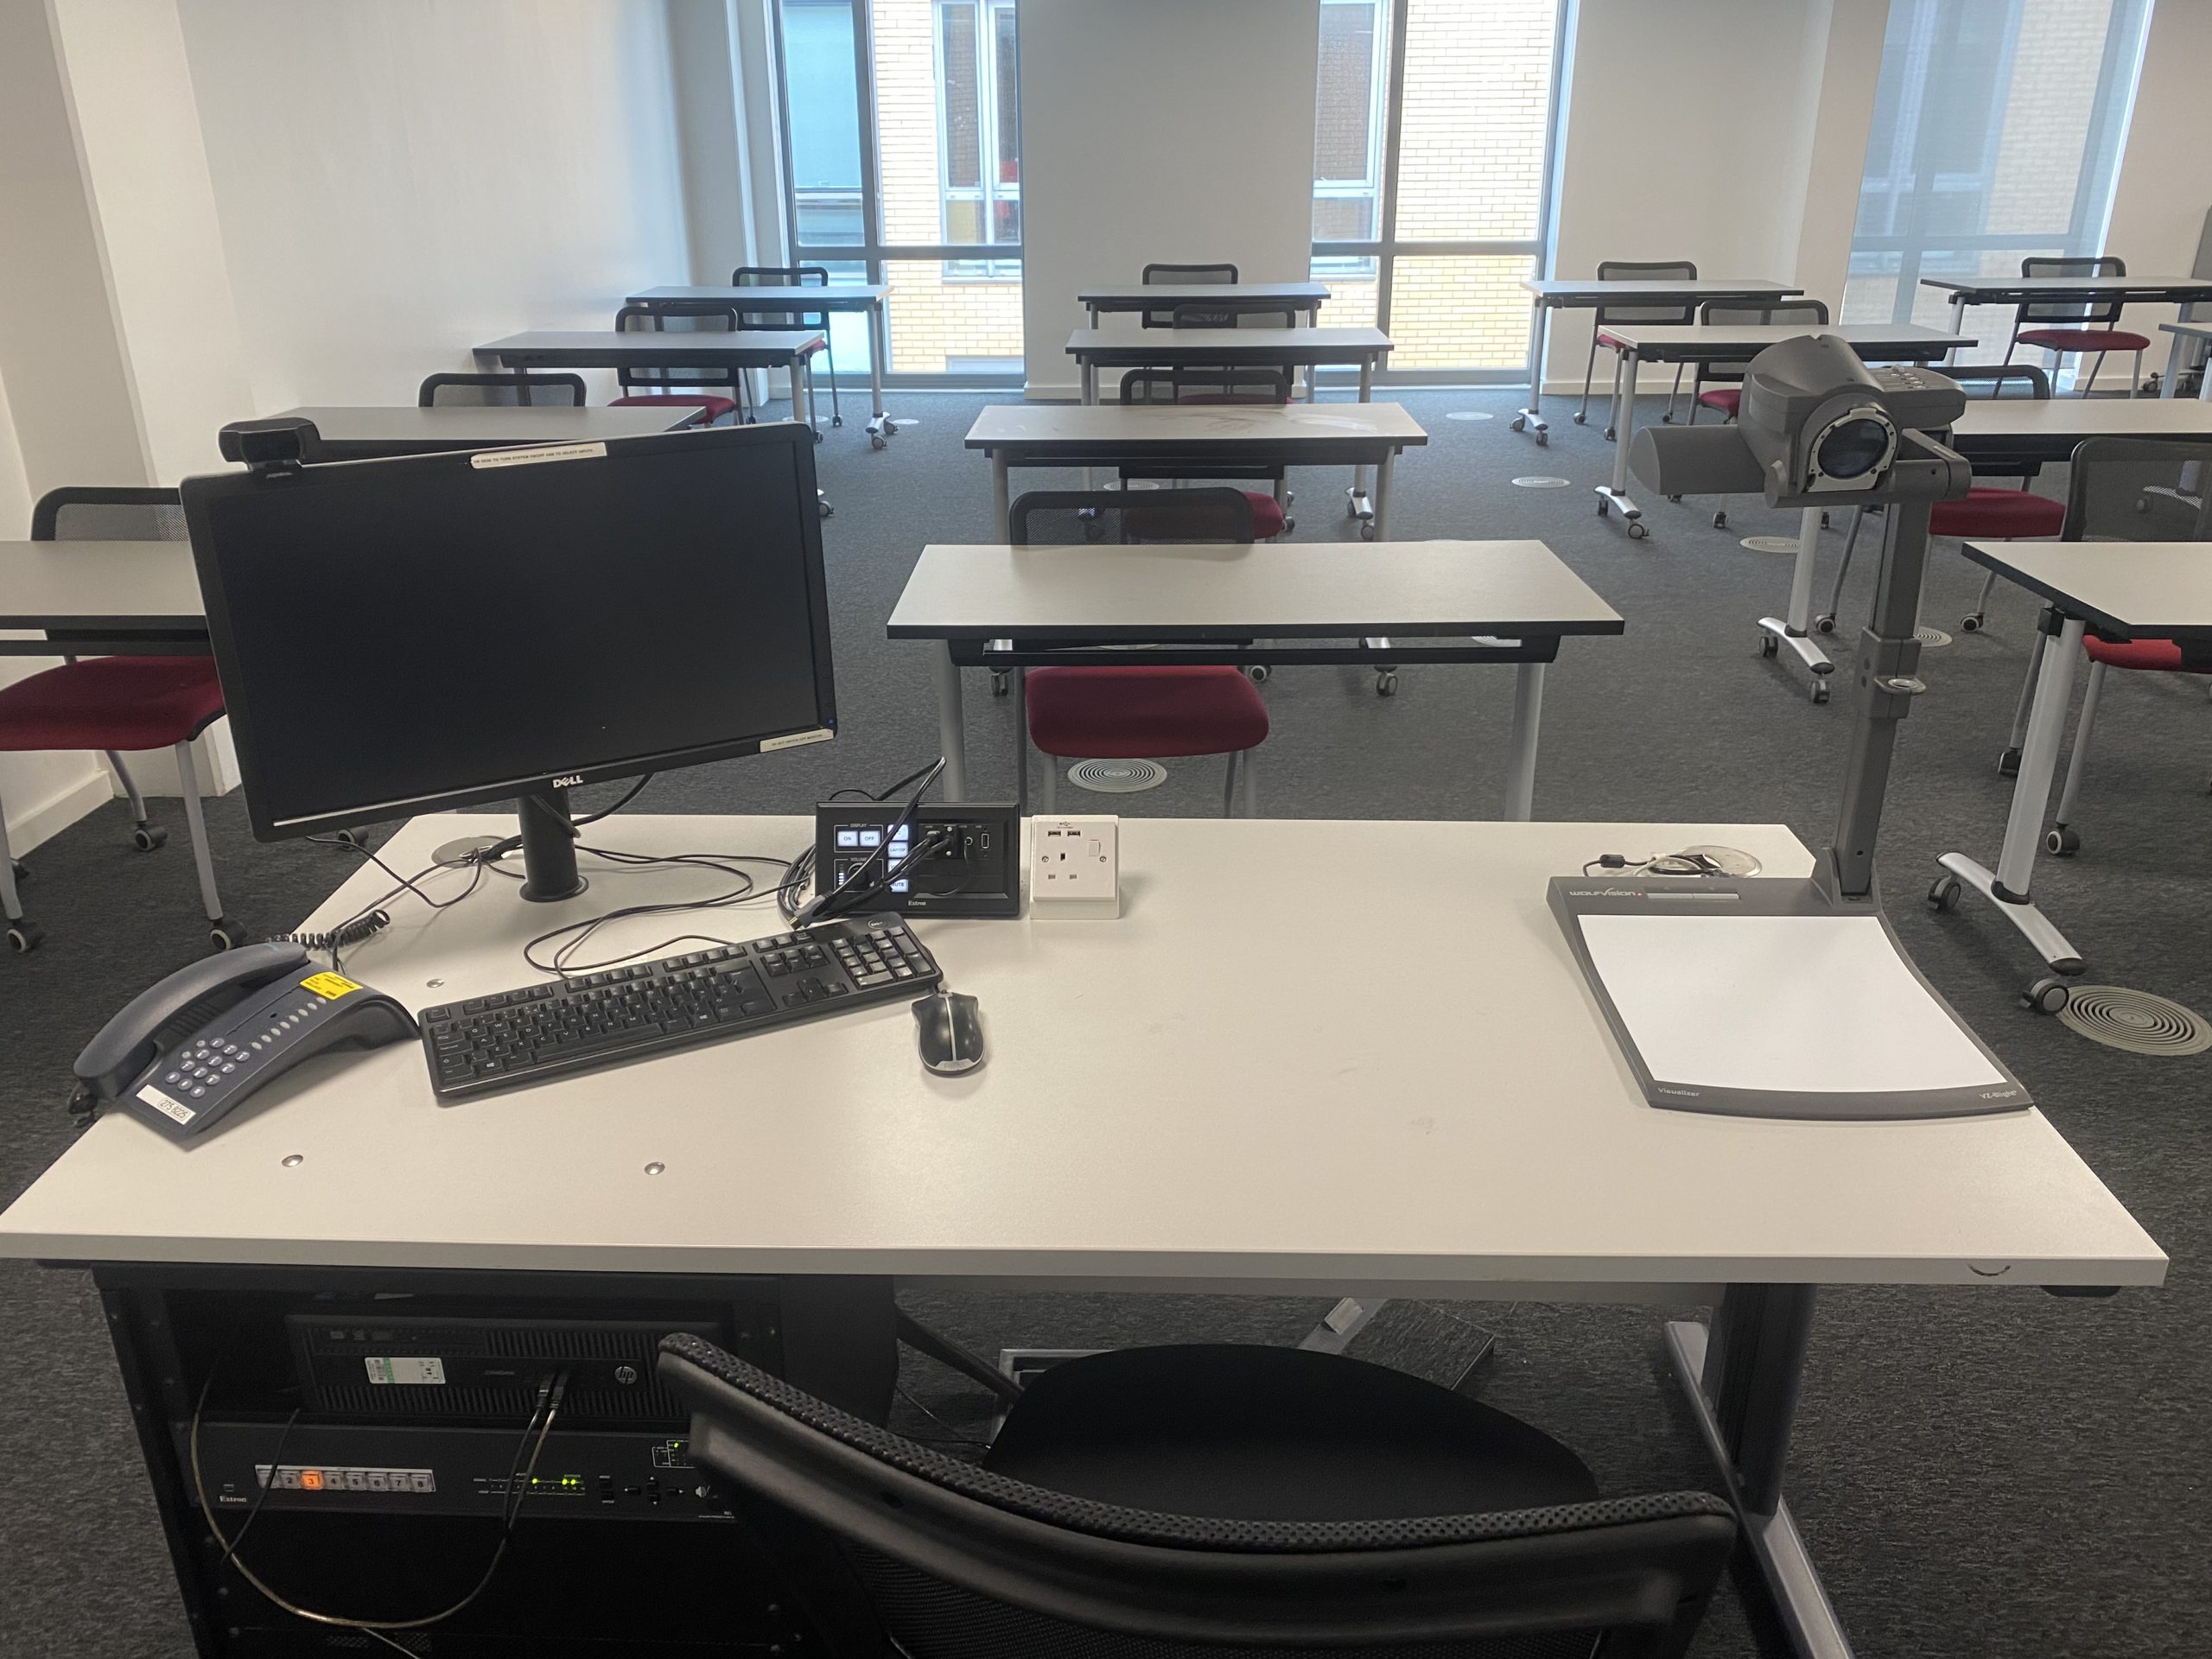
Please note that this technology is only available in specific classrooms. Here is a list of the enabled classrooms:
How do I use this technology?
The good news is that this technology is easy to use and has been set up ready for you.

Media Services have provided instructions on Dual Delivery Teaching.
Training and instruction on the use of the equipment can be organised with Media Services by emailing mediaservices@manchester.ac.uk.
How do I run a dual-mode teaching session?
Take your time and remember that this is very much a regular Zoom meeting.
Prior to the session, set up your scheduled meeting using your Zoom account and share the link with your students.
You can choose to record your meeting into your Zoom account. You then have the option to upload that video to the video portal and embed it within Blackboard or 1Med for viewing by your students at a later date. This is excellent for inclusivity as the video portal will create subtitles for your video. Please note that Zoom cloud recordings are automatically set to delete after 30 days.
Step-by-step guide
- Log into the computer in the room and sign into Zoom, or connect your laptop to the classroom technology using the HDMI cable, which will be clearly labelled.
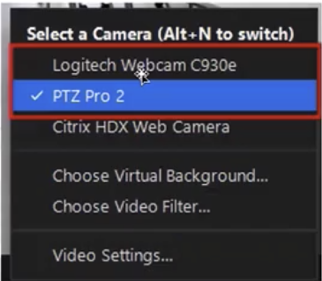
- Check your camera is set correctly. The default camera should be the one on the Tutor.
- Start your meeting.
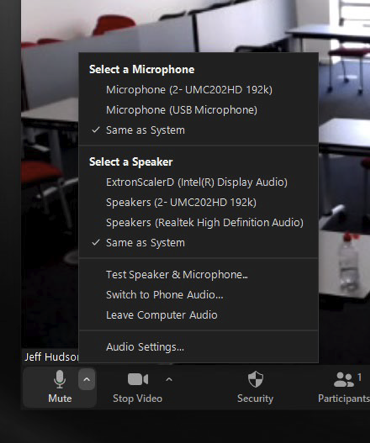
- When prompted, select ‘Join with Computer Audio’.
- Check your mic is set correctly. Select the arrow button within the Mute (Microphone) button and ensure that both the microphone and speaker are set to ‘Same as System’
- If you are recording, we recommend making both a verbal announcement and announce in the chat.
- Make sure to check the chat/hand-raising tools within your Zoom meeting often.
- Deliver your class.
- When finished, end the meeting.
Troubleshooting audio issues
- If the Microphone and Speaker are set to ‘Same as System’, the audio for the session will be captured by the room microphones and sound will output through the room speakers/PA system.
- Ensure that all microphones and speakers are muted unless speaking. Ask online participants to mute their microphones as well.
- Ensure that all unused microphones and speakers (i.e. your laptop, students with devices in the room) are muted or switched off (students in the classroom should join without computer audio).
- To reduce or stop echoing, make sure remote participants are muted and any handheld microphones are off when not in use.
- In the Zoom application, ensure microphone and speaker settings are set to ‘Same as system’ so that remote participants can be heard in class.
- If you are using facemasks within the classroom, surgical masks have been tested as being audibly clearer than other materials.
- If you want to speak to remote students without your voice being broadcast to the classroom, you could change the audio output from the classroom speaker to your laptop, or headphones.
Screen sharing tips
- Use ‘Switch Camera’ to switch between different views when screen sharing.

When sharing your screen, you could choose to share your presentation slides or the classroom camera
- If you want to fix a view, you can pin it.
- If content appears ‘flipped‘ in the classroom (e.g. the text of your slides is back to front) ensure you have unchecked ‘mirror my video‘ in Zoom’s video preferences.
Best practice tips
When should I consider using the dual-mode teaching method?
Dual-mode teaching allows you to sometimes hold sessions with students or lecturers being located in different places, such as on placement or having returned to their home address.
Whilst this may not be your first preference, public health measures may force some students to self-isolate or social distance. Preparing yourself by being practised in dual-mode teaching would allow all students to continue attending classes.
Due to its high levels of interaction, dual-mode teaching is often better suited to smaller groups with fewer than 80 participants.

How do I prepare myself for dual-mode teaching?
Familiarise yourself with the dual-mode teaching space before your session. You can book CTS spaces using Resource Booker.
What should I consider when planning for dual-mode teaching?
Communicate the level of preparation you are expecting students to bring to the lecture. If using a flipped–classroom approach, outline this to students. Asynchronous activities before and after the session can help to build a sense of community.
Cut down on the amount of content you might normally cover in a session. Rather than conveying information, focus on analysing issues or problems.
Think about the layout of the classroom: if the students’ desks are not facing each other, but facing forward, different communication styles may be appropriate.
Consider welcoming the class using the camera view of the full classroom so that remote students can see what you look like and allow them to situate themselves with the on-site students.
Build in time to allow for switching between screens.
Try to capture students’ attention and focus them in the first 5 minutes of the session. Start with something that allows students to be successful and is low–stakes, particularly if using technology that is unfamiliar.
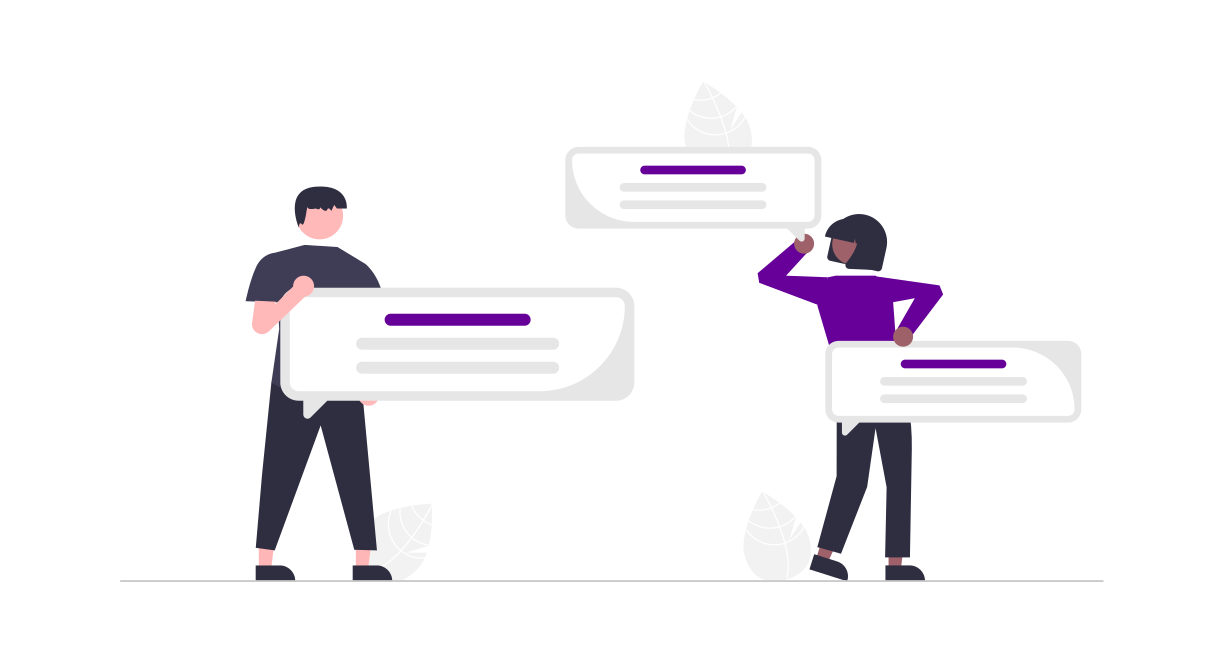
Ensure both in–class and remote participants have a way to interact in the class and ask questions of you. Students will need clear guidance on how to contribute to the session. Allow students more time to respond to questions, via technology. Confirm that you can hear remote students. Repeat questions from the room so that remote students can hear them.
Alternate asking for responses from remote and in–class students. Try to check in regularly with remote students during the session to ensure that they can see and hear the session.
Have planned breaks throughout the session to check in with anyone monitoring the chat. Salmon, G. (2013). The Five Stage Model.
Ask that students have their correct name showing so they can be easily identified if they ask a question or are not using their camera.
Try to do something new at least every 20 minutes which requires active learning strategies. Aim for activities that promote higher-order thinking.
Share or make presentation slides and other resources available on Blackboard/1Med prior to the session. If technical issues occur when screen sharing, participants still have a copy of the slides to refer to. If you are using or referring to slides, images or videos, you should screen share these, to ensure that all students can see them. Deliverables could be uploaded to the same VLE page or Padlet etc. during/after the session.
Ensure that both groups of students are clear on next steps/expectations. Consider posting these in the chat or online. Your plenary could include questions such as:
- Did you manage to access the session fully?
- What worked well for you in this session?
- What could be improved for our next session?
- Was the session timed appropriately?
Consider finishing the session a few minutes early and leaving the meeting open for any remote students to raise any issues with you.
How do I monitor the chat whilst delivering the session?
Consider assigning another member of staff or student to monitor the Zoom chat for any questions coming from remote students.
How do I prepare my students for dual-mode teaching?
Prior to the dual-mode session, explain or demonstrate dual–mode teaching, including any technologies you plan to use.
Consider facilitating a whole class discussion on what are the ground rules for large in-person or online discussions in lectures to ensure an inclusive class climate for all students. Alternatively, set expectations that sessions will be active and that you will be asking students to engage with activities as well as with each other. Yale University (2019). Active Learning.
Encourage remote participants to turn on their cameras so they can be seen and interact with participants in class (even just things like asking for a show of hands may keep both cohorts engaged and interacting in the same way).
Should all students be signed into Zoom?
It is recommended that all students, including those present in person, connect to Zoom so that all can interact together. Students at a distance should be able to hear what is being said by those in class, and vice versa. Students who are grouped together should keep their microphones closed when they are not speaking to the group, to avoid feedback.
What if oral/video communication becomes too difficult?
Consider other forms of communication and interactivity, such as polling, Q&A, a written group discussion and feedback or working collaboratively on documents:
- Zoom polls can be set up before or during the session.
- Mentimeter allows you to use live polls, quizzes, word clouds and Q&As.
- Nearpod presentations can contain polls, quizzes and other activities.
- Zoom chat is easy to use and can be saved after the session.
- Padlet allows users to post ‘notes’ on a digital wall that can include images, links and videos.
- Office 365 is useful for collaborating on documents.
More information: Enhancing interaction.
Still have questions? Contact eLearning and we may feature your question on this page.
Would you be interested in participating in a training session led by the FBMH eLearning Team?
Please register your interest here.
Page written by Rachel Heyes with thanks to Stuart Phillipson (HUMs eLearning), Rachel Wilder (HUMs eLearning), Ewan Chamings (FBMH eLearning), Chris Higson (Media Services) The Small Group Teaching Oversight Group, and all those who contributed to these resources, August 2021