This guide covers:
- Creating a lesson (quick guide)
- Editing the lesson later
- Distributing to students
Creating a lesson (quick guide)
The PDF linked below is an extract from the Softchalk Cloud Quick Start Guide from their ‘User Guides’ support section. It is recommended that you only follow the instructions in the extract below (Step 3) and refer to the other material for more in-depth information.
This will take you through making a 3-page Softchalk lesson with a quiz question, an activity and an embedded YouTube video and then saving it to Softchalk Cloud.
Editing the lesson later
Opening the lesson
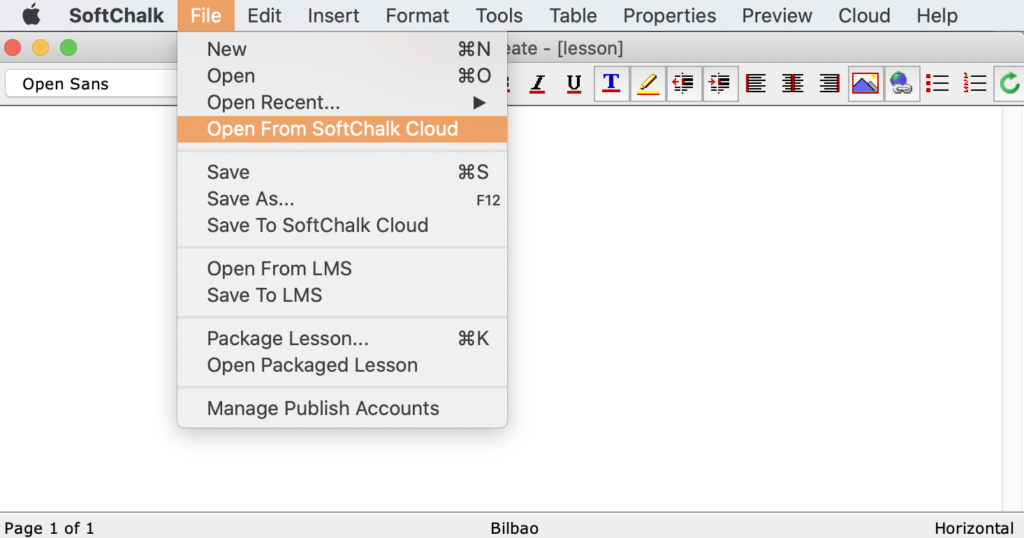
- Open the lesson editor and choose File > Open from SoftChalk Cloud. Choose your lesson from the list and click ‘Open’

- OR open from your SoftChalk Cloud lesson list. Log into SoftChalk Cloud and go to My Content > Lessons
- Click your lesson to open the lesson preview page
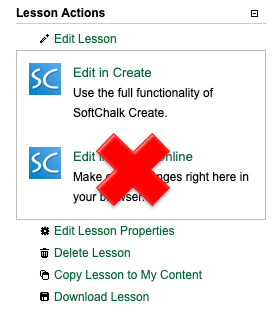
- Scroll down the page to the ‘Lesson Actions’ on the right-hand side
- Click Edit Lesson > Edit in Create
IMPORTANT – do not choose ‘Edit in Create Online’! We have had instances where lessons edited with this have become corrupted and it was not possible to restore them.

Saving the lesson
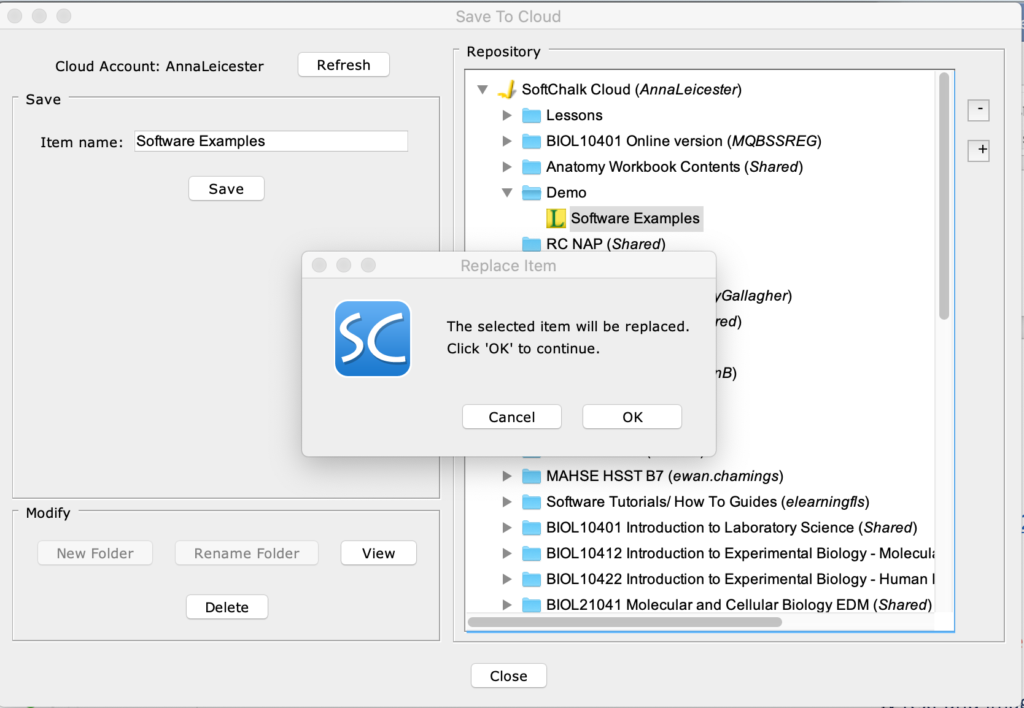
- To save, click File > Save to SoftChalk Cloud
- Make sure to overwrite the lesson when you save it so it keeps the same distribution URL. This means you will not have to send out a new link to students every time you make an edit. To do this, ensure it is selected in the list on the right-hand side of the save box before you click save
- A pop-up will appear to warn that you are replacing the lesson – click OK

Distributing to students
- Log into SoftChalk Cloud and go to My Content > Lessons
- Click your lesson to open the lesson preview page
- Scroll down the page to the ‘Lesson Actions’ on the right-hand side
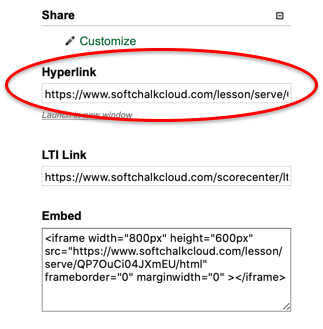
- Copy the Hyperlink URL
- Put this in your Blackboard course or send it in an email. This is a live link, so once distributed it does not need to be replaced when making updates


