

This guide is designed for the eLearning Team or experienced members of staff. For more support, please contact the eLearning Team.
iSpring packages created via the “iSpring Building Block” do not always copy across from year to year in Blackboard, with some users reporting that while the “inter-activities” are working for user, they are not generating scores in the grade centre. This guide is designed to make sure that your iSprings are set up correctly to avoid this problem.
Stage 1: Test your iSprings to see if they rolled over correctly.
- Enter your current Blackboard course and locate the iSpring content.
- If the iSpring is a SCORM then it is likely to have rolled over correctly, however we advise testing each one with a test user, ensuring that grades are entering the grade centre and that the scores are calculating correctly.
- If the iSpring has been added via the iSpring Building Block, then you will need to (or advise the user to) re-publish as a SCORM, which is discussed in Stage 2.
STAGE 2 Editing iSpring files or Publishing as SCORM:
- Locate the iSpring build files (a powerpoint with associated folder of the same name) and open the PowerPoint on a computer with iSpring software installed.
- Make any changes you need to the powerpoint and save.
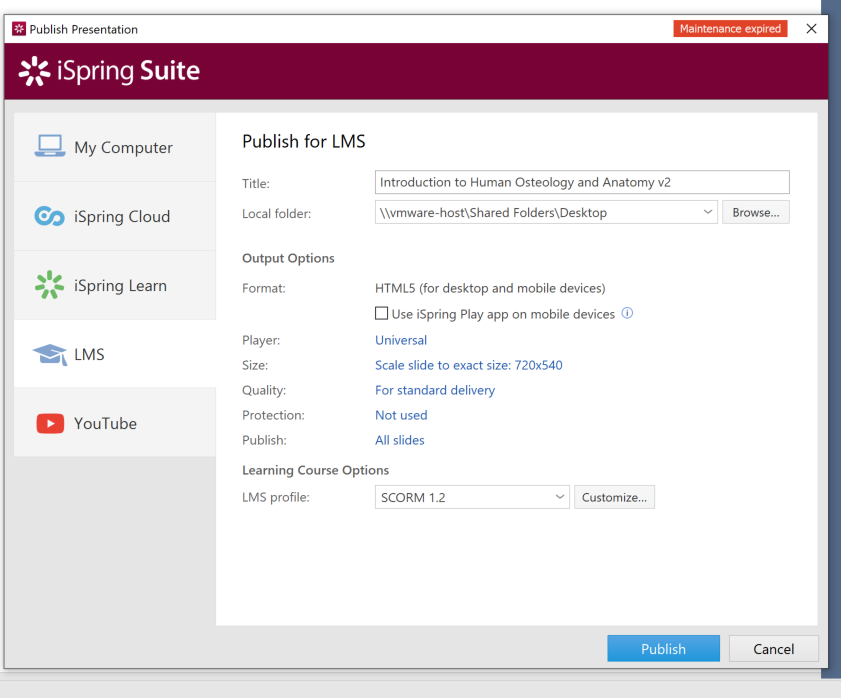
- Publish the iSpring as an LMS with the profile as SCORM 1.2 or 2004 2nd Edition into a location of your choice.
- You will now find a zip file of your iSpring/SCORM in your specified location.
STAGE 2: Uploading your published file into Blackboard
- Once you have a published zip file. Open Blackboard and find the course that will host the iSpring.
- Locate the area to host the iSpring in the left-hand menu. E.g. Assessments/ Course Content.
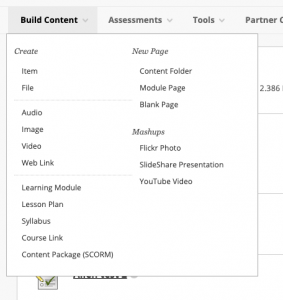
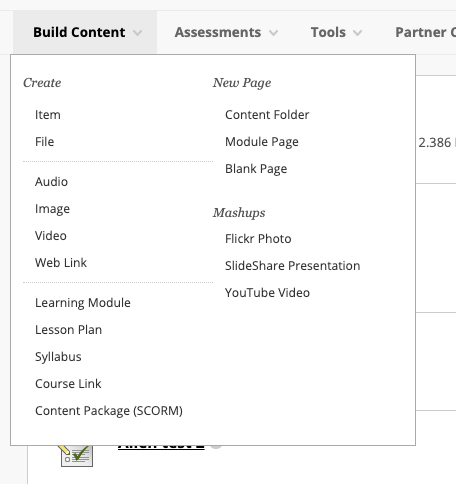
- Click on “Build Content” on the top of the page and select the Content Package (SCORM)
- Click “browse my computer” and locate the zipped file you created. (It will be the same title as your presentation with the file extension .zip) once you have found the title click “Submit”
STAGE 3 Settings
How to use Blackboard settings for iSpring:
- Fill in the description, if you are using the same information as the year before you can just copy and paste this across from last year’s course.
- “Make SCORM Available Yes/No”: This setting is all about making this available to students. You can set this to Yes if you are going to delay the release date and this means you do not have to come back and manually make this available. If you are going to manually release this later, select No. You can come back and change the settings to Yes when you would like students to be able to view it. (Note: for testing remember that you will have to selectively add access to your preview user if you are not making the iSpring available immediately.)
- Select your preferred setting for how many times you want students to access the content.

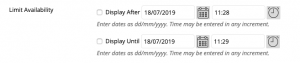
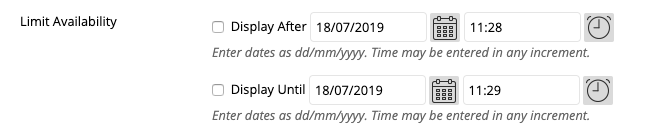
- If you want to set a limited time period or future release of the iSpring and you have selected Make SCORM available: Yes, then add your dates here:
- The SCORE setting is default, it is the one which allows different options later on as well. If you do not want to grade the iSpring, you can change this in the Grade Centre afterwards. You cannot go back and change this setting so please be sure that you know which one you would like to use. You will also not receive any specific information about each quiz, so be please be aware that the score you set up will be an overall one. If you are grading the iSpring, set which attempt will count towards the final mark if using the Unlimited Attempts setting. Once you are content with these settings click submit. If you are using unlimited attempts for quizzes be aware that what you will receive at the end of assessment is a completion score.

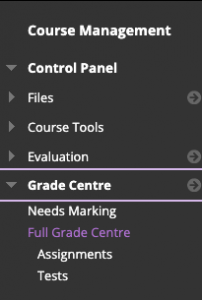
Stage 4 Grade Centre
- Locate the Grade Centre in the left-hand menu, and click full Grade Centre to check if your iSpring title has appeared on list.
- To change the type of score which your column displays (percent/score/complete etc) locate your iSpring in the column and click Edit column information.
- At this stage you can chose whether you would like a percentage/score or incomplete/complete display in this column.

Stage 5 Using assessed iSpring for revision.
- You may reuse your iSpring content for revision purposes. You can re-upload the same .zip file you created, but remember to change the name once it’s uploaded. You also may want to change some the settings, so that they are different to the graded version, e.g. allowing multiple attempts, a longer open period and removing the scoring. Please remember to add an end date, even if the end date is not until after the summer resits: this way it will automatically switch off before your course runs next year.
- If you have used the same .zip file as the assessment you will need to rename the revision column in the Grade Centre, as it will default to the same title.
- Click Edit Column Information, to change the title.
Important! Test your iSpring using the student preview user on Blackboard before releasing to students and make sure that marks are appearing in the grade centre.