

Making content visually pleasing
Getting started
When starting to create content for use in Blackboard, it is a good idea to begin in a software similar to Word, or in Word using Office 365, if you are collaborating with others. This will ensure that you are more likely to spot spelling errors or grammatical mistakes. It also allows you to create a structure for any content which you are planning to add into Blackboard. Please note: Do not spend time on formatting within Word, as ALL formatting will be removed from the document prior to your move into Blackboard.
Adding a structure to your online content up front can save you and your students hours of searching in the future, and allows your content to flow more easily. Consider up front:
- Section titles
- Sub-sections
- Content numbering systems.
Discuss with your colleagues what information should be on a single page and what should be added into a folder – ensure that everyone is working with the same structure.
Also at this time, it is good to find some imagery that can be used across your course and gather these together. We will come to images further in the training.
Items vs. Folders
- Item: A piece of content
- Folder: A ‘container’ for your content
Much well-designed content will be created using the Blackboard Item tool. This tool allows you to add text, images, embedded items, tables, web links and almost anything else you can think of.
When working with Blackboard, remember that you can organise Items (and other content) into Folders. A Folder is a container for content, just like a folder on your computer. However, when it comes to online teaching and learning, making Folders look good is dependent on adding a helpful description of what is contained within, and perhaps providing an icon or image to make it visually pleasing.
It is vital to remember that Folders are for storing multiple types of content, whereas an Item is just one piece of content. Only use Folders when you need to keep multiple related pieces of content together, as students can be confused when presented with empty Folders where the content is located in the Folder description only.
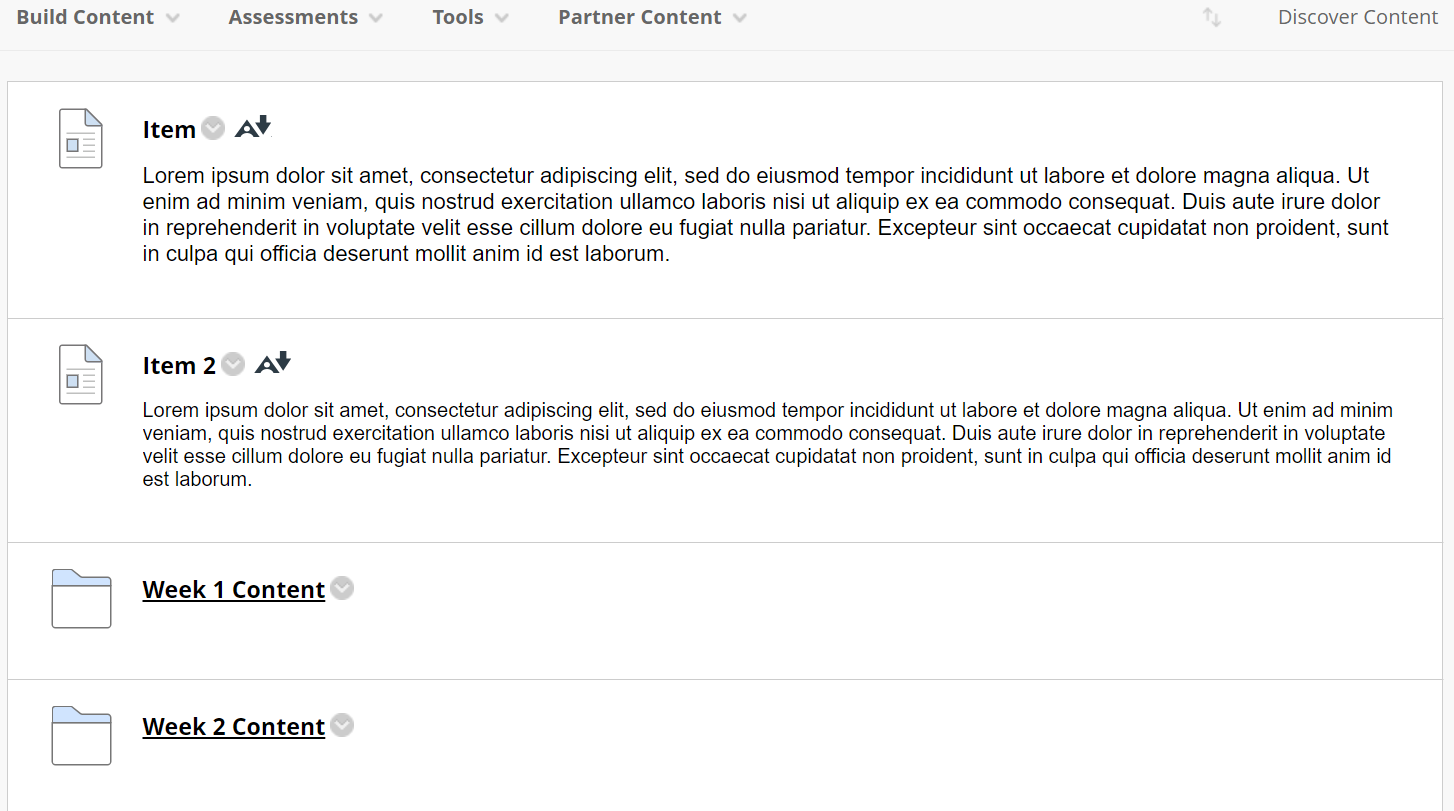
Activity: Add some Items and Folders
Open your sandpit Blackboard course (or another course where you feel able to freely edit without students seeing) and locate a course content section. In here, you should:
- Add 3 Folders called: Week 1 Content, Week 2 Content, Week 3 Content
- Add an item and copy some text into the description from a website or from Word
- Move the item to the top of the page
- Create a second item and type in some text into the description (not copy/paste)
- Move the second item to the top of the page.
In this example activity, we have stuck with consistently sized names and paragraphs; as such, the page looks a little neat. However, you will find that in “real life” things are not this straightforward and content does not always appear as tidy.
A closer inspection…
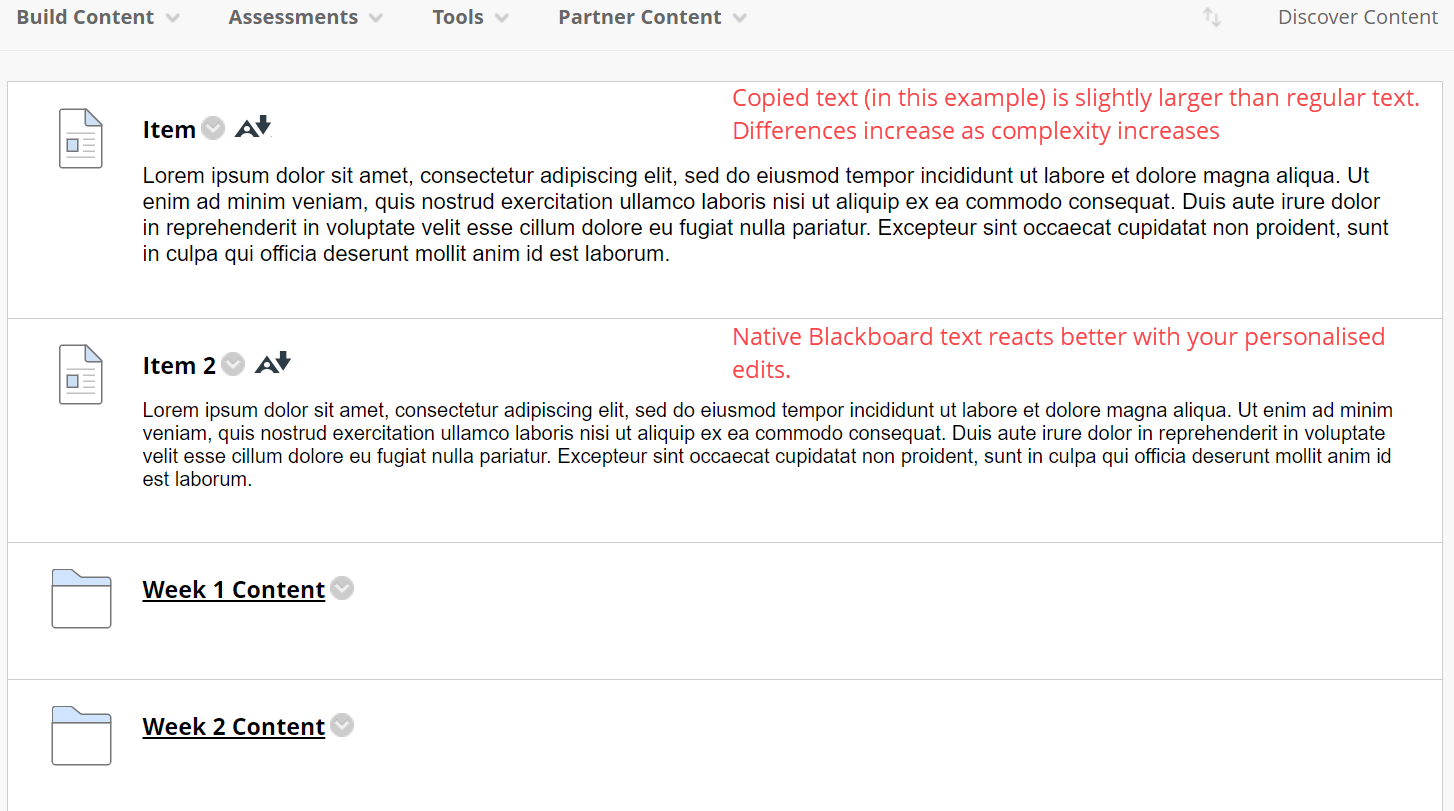
In this example, the top Item looks very similar to the bottom Item; however, tiny errors have already started to creep in that will cause you difficulty in keeping consistency throughout the course. In this case, the difference is a small text sizing error. In making good content, consistency is key.
Copying and pasting
If you look carefully, you will notice that your copied/pasted text looks subtly different from that which you typed in. The more formatting present in the document you copy from, the more small inconsistencies will appear in your course.
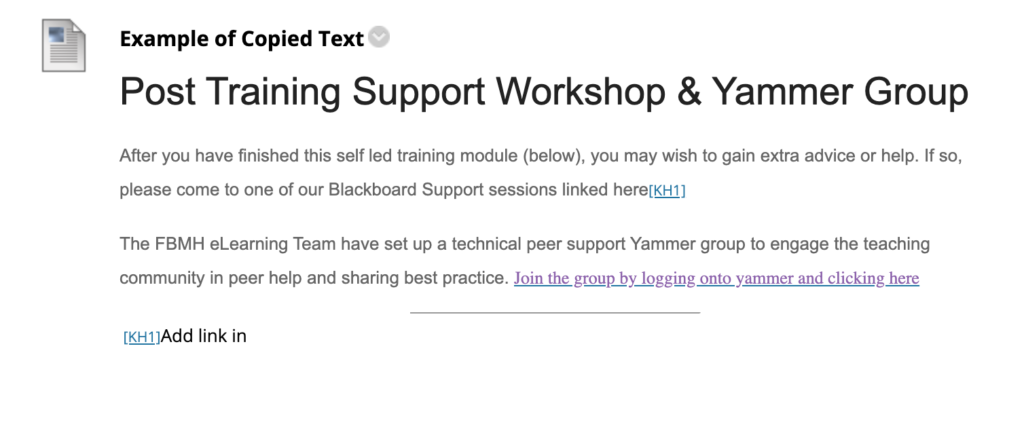
Here is an example of some copied text which contained a lot of formatting in the original Word document – you should note:
- Differences in line spaces
- Differences in colour
- Changes to fonts
- Links copied in
- If you hover over the text, the background appears white.
The more you copy and paste text into Blackboard, the more you will notice these inconsistencies. They are caused by Blackboard trying to interpret all formatting in your original document. Sadly, Blackboard does not do this very well.
Avoiding copy/paste formatting problems
If you are committing to getting the design for your course perfect, the best thing to try is to use the built-in Blackboard formatting as much as you can. To do this, you need to remove formatting from your content.
This sounds quite complicated but, thankfully, it’s not!
When pasting your content into the text editor, you will see the following pop-up window:
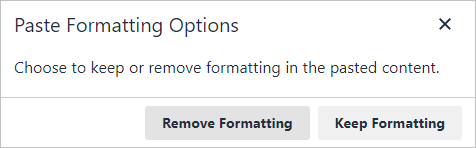
You simply select the “Remove Formatting” option. This will not necessarily remove ALL formatting, as the text editor will recognise headings, for example, and may try to retain these.
Activity: Using Notepad (PC) or TextEdit (Mac)
- Find a Word document with content which you can practice adding into Blackboard and open it.
- Copy the text into Notepad or Text Edit
- Notepad (PC): Copy the text into Notepad – you may wish to change the settings to allow word wrap.
- Text Edit (Mac): Copy the text into TextEdit, click “format” and “make plain text”.
- The text in your Notepad/TextEdit file is now free from formatting and is in a text file.
- Copy your text from your text file into your Blackboard Items (or folders). You will find that you are now free to format as you choose.
FAQs
Next: How to use the editor…