This guide covers:
- Page 1 Creating a lesson, setting the theme, previewing and saving to SoftChalk Cloud
- Page 2 Add special characters, images, tables and hyperlinks
- Page 3 Pages, navigation, headings and sidebars
- Page 4 Adding an Overview page, changing the layout and theme, creating a theme
- Page 5 Editing the lesson later
- Page 6 Distributing to students
Within this content, you will find links to the relevant learning material from SoftChalk’s eLearning video guides.
Editing the lesson later
Opening the lesson
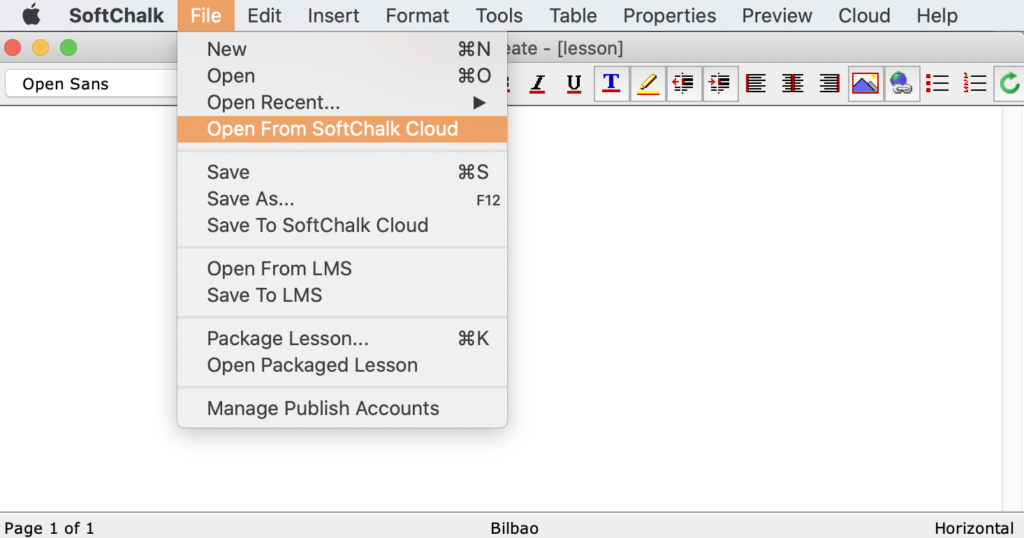
- Open the lesson editor and choose File > Open from SoftChalk Cloud. Choose your lesson from the list and click ‘Open’

- OR open from your SoftChalk Cloud lesson list. Log into SoftChalk Cloud and go to My Content > Lessons
- Click your lesson to open the lesson preview page
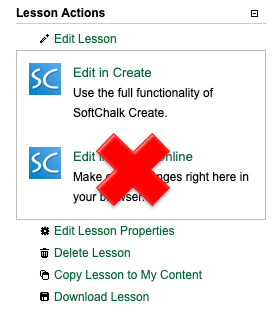
- Scroll down the page to the ‘Lesson Actions’ on the right-hand side
- Click Edit Lesson > Edit in Create
IMPORTANT – do not choose ‘Edit in Create Online’! We have had instances where lessons edited with this have become corrupted and it was not possible to restore them.

Saving the lesson
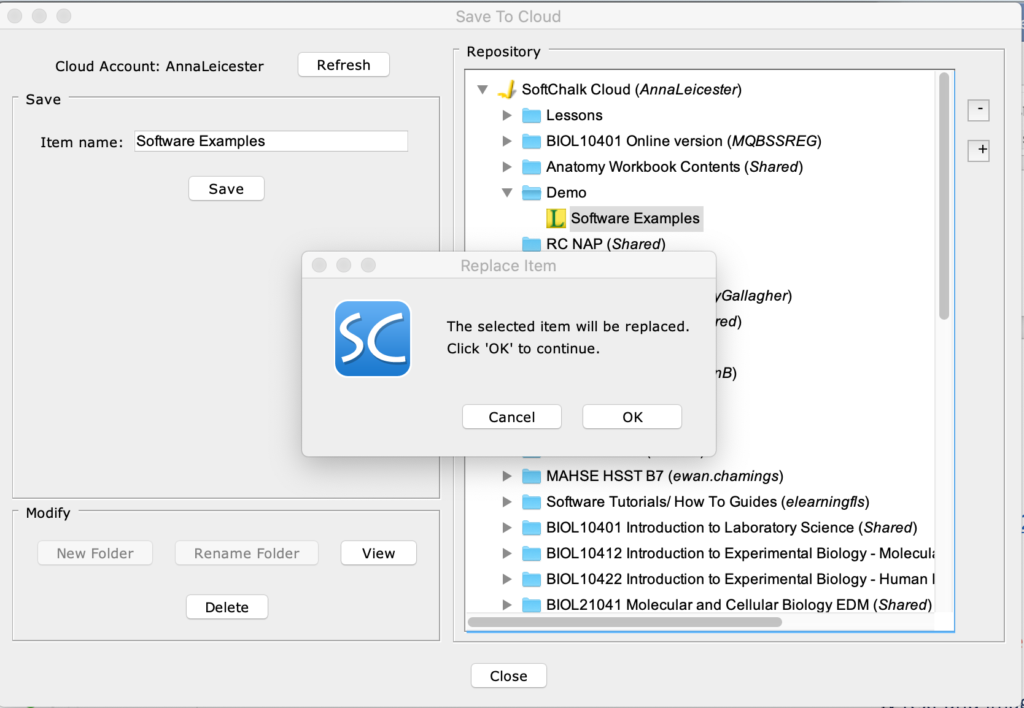
- To save, click File > Save to SoftChalk Cloud
- Make sure to overwrite the lesson when you save it so it keeps the same distribution URL. This means you will not have to send out a new link to students every time you make an edit. To do this, ensure it is selected in the list on the right-hand side of the save box before you click save
- A pop-up will appear to warn that you are replacing the lesson – click OK


