
Layout – Blackboard Course
Watch this short video that briefly explains the structure of a course (please note that navigating from the main Blackboard page to your course is different in the video):
Navigate Inside a Course
When you enter your course, you will see a view similar to that shown below. The course (1) overlays the Blackboard main page (2). When you have finished working on your course, click the X in the top-left area (3) to exit and return to the Blackboard main page.
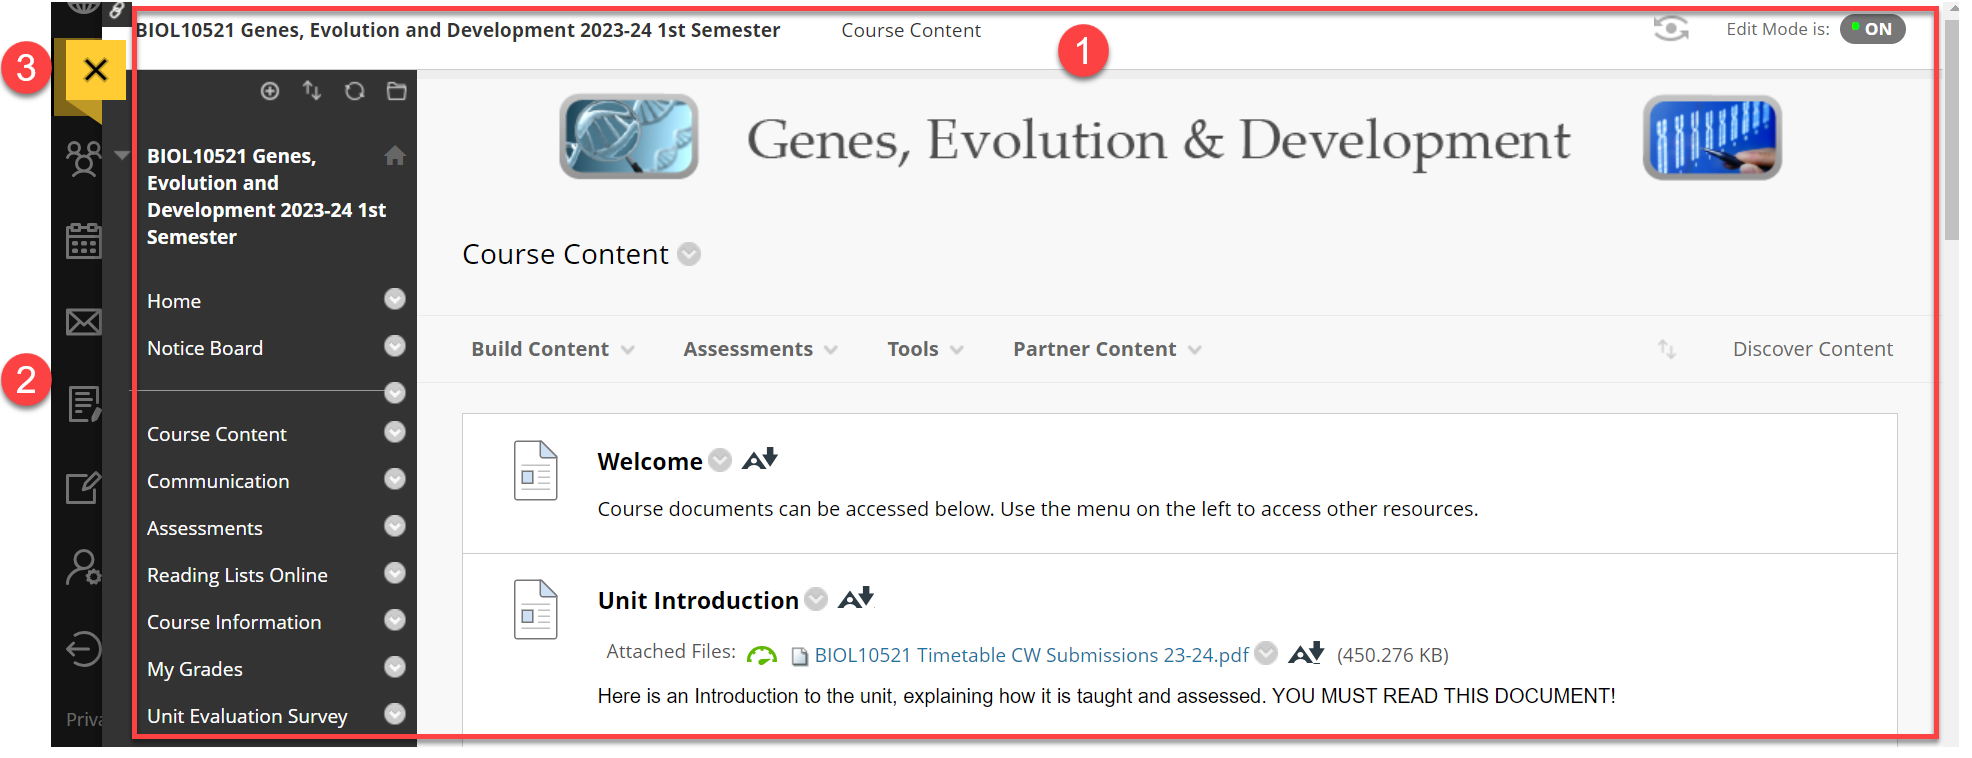
When you enter the course you will see the landing page (usually entitled Home or Homepage). It’s the first page students see when they enter your course, so it is worth thinking about what you want this page to show – it should act as a clear starting point for students.
Your course content appears in the main window to the right of the course menu. You use the functions above the main window to add content, such as Build Content and Assessments.
The top of the course page (highlighted in the red box) will look similar to this:

This shows from the left:
- The Course Title
- The name of the landing page (in this case, ‘Home’) .
- The option to activate ‘Student Preview’
- The option to toggle ‘Edit Mode’ Off/On
Activity
- Hover your cursor over the Student Preview symbol, then click on it.
- You should see an orange bar with the message ‘Entering Student Preview‘ which will then change to ‘Student Preview mode is ON‘
- Notice how your view of the page alters.
- Move around the course, selecting different content – you are experiencing the course more or less as a student would. Is it easy to navigate? Is the content presented logically?
- Click on the Exit Preview button to return to the staff view. Leave the exit options on the default setting and click Continue.
Although this is not 100 per cent a true student view, it is a very useful way of seeing how your content presents to the students. Further information is available via BB Preview Users.
Activity
- Look at the Edit Mode button – it may show as OFF or ON. If it is OFF, click on it to toggle the option to ON.
- See if you can spot any differences.
- The main change is that existing content items now have a down facing arrow (action link) against them to allow edits.
- Click on one of these arrows and look at the options that are available for that content item.
It is very important to check that Edit mode is ON when you enter the course. If you find that you are unable to edit a course, or view certain content, check Edit mode. It’s easy to forget!
We will return to editing later on in the Adding Content section of training.
If you feel confident with the layout we have covered so far, move to the next page. where we will look at the left-hand menu.