

Left-hand menu (top)
The top left-hand menu (often referred to as the Student Menu) provides an access point for all the course content and is the only menu that the students see. You can create links on this menu to present tools and materials to your students. Note that the University recommends some level of uniformity in the menu, to make navigation easy for all.
The standard course structure sets out the most commonly required content areas. The menu structure used most often in FBMH is seen in the example below. If your school or division has something different, then you should use that to retain consistency for your students.
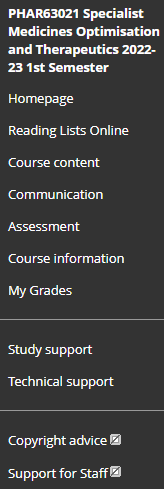
Homepage: The landing page that introduces your students to the unit.
Reading Lists Online: A link to the University of Manchester’s reading list management system
Course Content: All resources relating to learning should be contained here, e.g. PowerPoints, PDFs, videos, etc.
Communication: How will you communicate with your students? Discussion boards? Announcements?
Assessment: Information on how the unit is assessed, with links to submission areas.
Course information: Handbooks, contact details, lecture times, etc.
My Grades (My Marks): Where a student can obtain results and feedback.
Automatically added to all units:
Technical Support and Study Support: Links to the eLearning Team website for students, where they can get help with Blackboard and study support.
Copyright advice and Support for Staff: Links to Copyright information and the eLearning Team website for staff (these links are not visible to students).
Left-hand menu (course management)
The Course Management menu appears below the student menu and provides access to the Control Panel. This is where the course administration tools are located, such as the Grade Centre, the file repository and Course Tools.
This menu can only be accessed by staff on the course – students don’t see it.
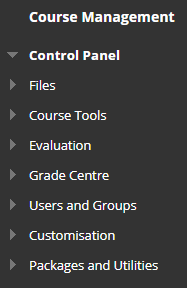
Control Panel
Not all the options available in the Control Panel are used and some only occasionally. For the basics, we will cover the more straight-forward options, but there are more that you will become accustomed to as your experience develops.
Examples are:
- Files: A file repository where all your files are stored (only available to staff on the course).
- Course Tools: Access to tools like “Assessments”, “Tests”, “Discussion Boards”, etc.
- Grade Centre: Where all the student grades are stored and processed.
- Users and Groups:
- Users: A full list of those who have access to the course.
- Groups: The ability to group these users to provide tailored personalised content.
Course Tools
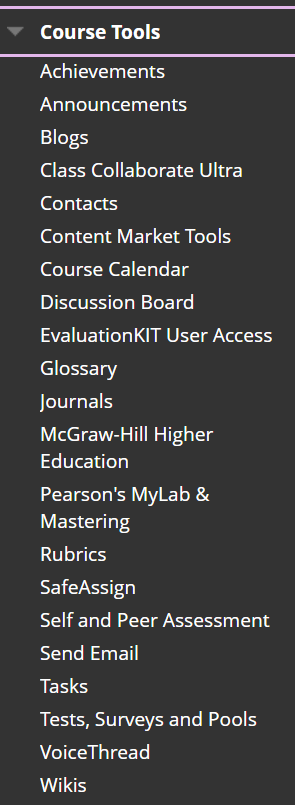
There are a number of options under the Course Tools menu, not all of which are covered in the basic training. You may want to start with:
- Announcements: Alert your students to upcoming deadlines or provide timely information such as a last-minute change to schedule. You can also send the Announcement out via email.
- Class Collaborate Ultra: Use Blackboard’s video conferencing tool to interact synchronously with your students.
- Discussion Board: Enable your students to talk to each other and you online (asynchronously).
- Test, Surveys and Pools: Create an assessment or questions to assess your students.
Summary
- Click on a course title in your course list to enter it.
- Ensure that “Edit Mode” is “ON” before working.
- Top left-hand menu is visible to students.
- Keep to a standard structure.
- Use the bottom left-hand menu to create/explore tools.
This is not visible to students. - Use “Student Preview” to see how your students interact with the content.

Success! You have completed the section: Getting Started with Blackboard.
If you feel confident with what we have covered here, then you may want to look at the next section: Adding Content.