

Adding a Web Link
Adding a Web Link to your Content Area is similar to adding an item. You select “Build Content”, then choose “Web Link” from the list.
Things to remember:
- With a Web Link, the Name and URL are required fields.
- You can add text and attach files, much like an Item.
- You should keep the WEB LINK OPTIONS as the default: “Open in New Window”.
- Leave the “This link is to a Tool Provider” option deselected (default).
Activity – Add a web link
- Enter your content area and use “Build Content” > “Web Link”.
- Add a name and the URL (web address).
- Add some explanatory text.
- Keep the other options on at their default setting.
- Submit to save what you have done.
- Now, check that the link works!
Adding a content folder
As mentioned earlier, using folders will help to present your content to students in a logical and uncluttered way. If your course is delivered on a weekly basis, you could create folders for each week and have the relevant content in the corresponding week.
To add a folder to your content area use “Build Content” and select “Content Folder”. As with the other types of content, the name is a required field.
Once you have created a folder, click on the name to enter it and start adding your content. We will cover this on the next page.
Things to remember:
It saves time if you create your folders before adding your content. That way, you can add Week 1 content directly into the Week 1 folder. If you add the content first, you will then have to move each piece of content individually to the relevant folder – a duplication of effort you will want to avoid!
Activity – Build a folder
- In your content area, use “Build Content” to create a “Content Folder”.
- Give your folder a name to indicate what would be inside it (Week 1/Lecture 1/Topic 1).
- Put a description against your folder.
- Set a date for when it will become available.
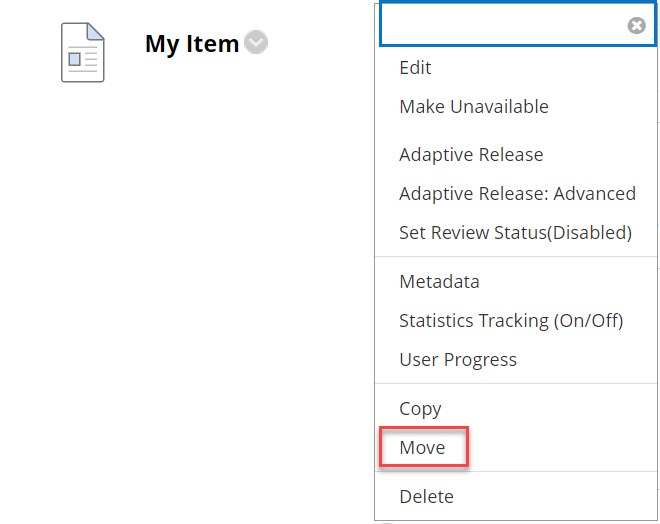
There may be times when you want to copy or move existing content into a different folder. This is where you can use the action link (down-facing arrow) against the content item to select edit options.
Here you can:
- Edit
- Make unavailable (i.e. hidden from student view)
- Copy
- Move
- Delete
- Set adaptive release settings such as dates.
In this case, you would select “Move”.
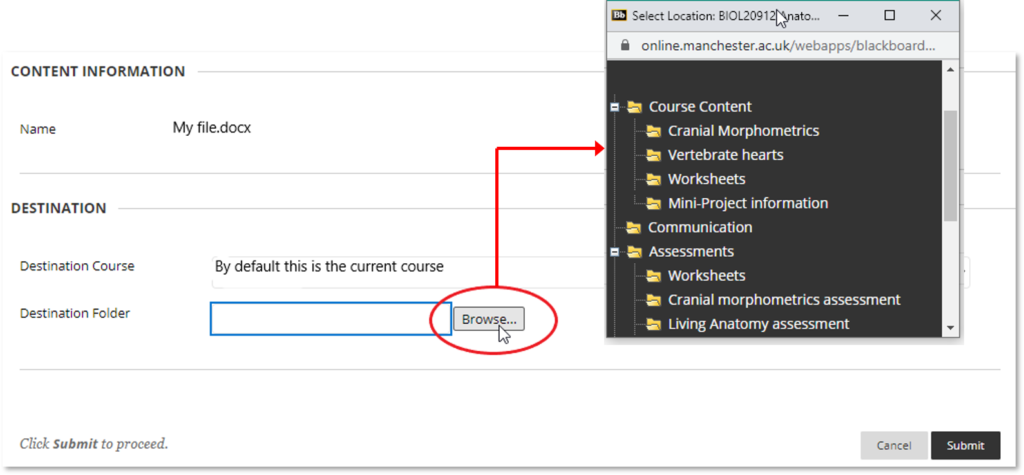
You then select “Browse” and choose the new location from the pop-up window that appears.
Further help
You may find the following section on the Blackboard site helpful: Copy and move content.
Now that you have added a folder, we will go through the process of adding a file.