

Adding files
Before working through this section, it might help to remind yourself of how to upload files to the Content Collection. Ideally, you will already have uploaded some files at this stage – Word documents, PDFs, PowerPoint files, Excel spreadsheets, etc.
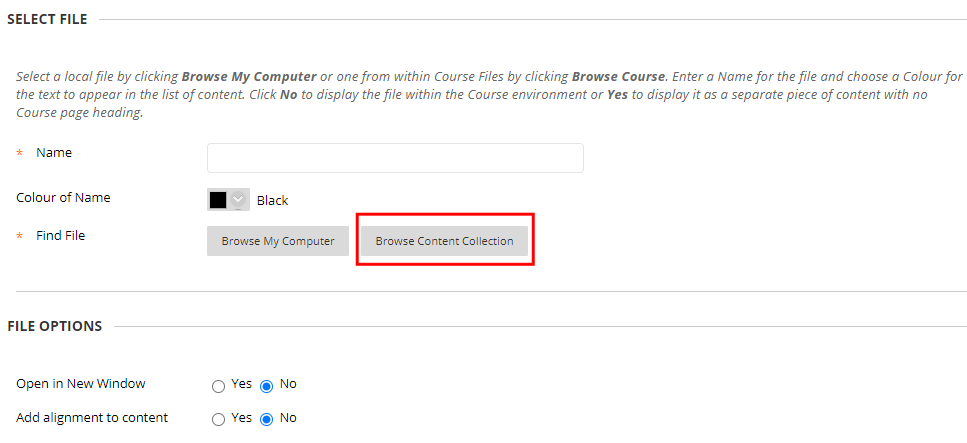
- Adding a File to your Content Area uses the “Build Content” menu with which you are now familiar. Select “File” from the list of options.
- When you come to the part where you find your file, select the “Browse Content Collection” option.
- You will see a list of the folders and files in your Content Collection. If this area is well organised, it should be straightforward to locate the file you want.
- Select Yes for Open in New Window to display the content in a new window or tab.
Once you have added the file, it will be displayed in your content area.
Activity
- Go to your content area and find the content folder that you created in the previous activity.
- Click on the folder to enter it.
- Following the process outlined above, add a file from the Content Collection. Make sure it has a meaningful name.
- Submit to save.
Things to remember:
If you have a large number of folders (and sub-folders) in your course, you can keep track of where you are by using the “breadcrumb trail” at the top of the page (just underneath the Student Preview option). It shows where you are currently in the course and allows you to backtrack by stages.

An alternative way to add a file
There is another way to add files that is viewed as an “easier” method because it is quicker. This is done by selecting a file directly from your computer, without first uploading it to the Content Collection. This method still adds the file to the Content Collection but does not allow you to choose the exact destination. It is automatically saved in the top-level folder of the Content Collection.
If you add your content this way, your Content Collection will fairly quickly contain a large number of files that are not organised in folders. This problem is made worse if you have other instructors on the course adding their own files in the same way. After a few years of running the course, you will end up with an unwieldy Content Collection containing hundreds of files, many of them duplicated, with no quick way of knowing which are out-of-date or obsolete.
Summary
- Build your content by entering a Content Area and clicking “Build Content”.
- Items are the best options to choose, as they are very versatile.
- Using “Create Folder” allows you to use folders to organise your content.
- There are two ways to upload files:
- Easy way (which can cause issues later)
- Via the Content Collection (not as quick, but makes your course easier to manage long term).

Success! You have completed the section: Making Your Course Look Good.
If you feel confident with what we have covered here, then you may want to look at the next section: Enabling discussion.